
Mastering Your WordPress Theme Hacks and Techniques
This is the first article in the four-part series, "Powerful guide to master Your WordPress". Throughout this article, we’ll be focus on many WordPress Theme hacks, ideas, tips and useful tutorials you need to have ready in hand when developing WordPress websites.
We’ll keep this post updated during this month. As we’ll check your suggestions and feedback,
select the best, add them to this list and provide a direct link to the person who submitted
the suggestion.-
This is the Loop
1)The Loop is perhaps the most important thing one needs to understand when customizing WordPress theme. Any HTML or PHP code placed between where The Loop starts and where The Loop ends will be used for each post. When WordPress documentation states "This tag must be within The Loop", such as for specific Template Tag or plugins, this is The Loop.<?php if(have_posts()) : ?> <?php while(have_posts()) : the_post(); ?> // the code inside the loop <?php endwhile; ?> <?php else : ?> <?php endif; ?>-
Further Readings On The Loop

1)Modifying Individual Posts In The Loop- Sometimes Clients request things like Google ads being displayed after post #2, the top post having a differently colored background, only displaying the title for a few posts. You can’t do any of this inside a single Loop, so here’s how to use multiple loops to display lists of posts differently.How to use multiple loops to display lists of posts differently. 2)Embed Google Ad in First WordPress Post- One of the more effective places to implement Google Adsense is after the first post, so you want to prevent your ad code from appearing after every single post, as WordPress would just loop and keep showing it. All you need to do is add this code inside the loop.
You can also publish the advertisement after the second post or the third etc. Just change: “count == 1? to “count == 2?<?php if ($count == 1) : ?> // Insert your Google AdSense code here <?php endif; $count ; ?>
-
-
Category Related Techniques
The first step in modifying what happens when someone visits a Category page is to figure out which of your theme's files is going to be used to display the posts. This is known as the Template Hierarchy. This diagram, tells us most of what we need to know about organization of WordPress themes. Change the number of posts displayed in Category Page. You will need to open index.php file and find the line below,
then add this line right below it:<?php if (have_posts()) : ?>
Where number "4" is the number of posts you want to be displayed on every category page. Have a different template for specific Category So, if you want to make the Category whose ID number is 7 look different from what it is currently (and different from other Category pages), just create a category-7.php template file (or whatever your category ID is) in your current theme folder and customize it as you please. WordPress automatically checks for this, and will use the file if it exists. Please notice how we added the "-" and after it the id number of the category. Displaying single post pages differently in specific category For example, if you have a category called “News” and a category called “Tutorials” and you want the Stylesheet of the "News" category to be style1.css, and the stylesheet of the “Tutorials” category to be style2.css. Lorelle provides a simple solution by following the directions below: Open single.php file and delete all the content and add the following code<?php if (is_category()) { $posts = query_posts($query_string . '&showposts=4'); } ?>
In the most simple terms, the PHP code issues a query that says: Check the post. If the post is in category ID number 9, display single2.php. If not in category ID number 9, display single1.php.<?php $post = $wp_query->post; if ( in_category('9') ) { include(TEMPLATEPATH . '/single2.php'); } else { include(TEMPLATEPATH . '/single1.php'); } ?>-
Further Reading on Categories
1)What Every Blogger Needs to Know About Categories- You can help your users, improve your SEO, and gain absolute control over your content by implementing your own WordPress category solution!
-
-
Conditional Tags
Conditional Tags can be used in your Template files to change what content is displayed and how that content is displayed on a particular page depending on what conditions that page matches. Styling different categories: If you want to use certain stylesheet for specific category, all you have to do is add the code below to the <head> tag in your index.php file.
Dynamic file content If you want to include a file that will only appear on the home page, Place this code in the index.php:<?php if ( is_category('15') ) { <link rel="stylesheet" href="<?php bloginfo('template_url'); ?>/cat-15.css" type="text/css" media="screen" />; <?php } else { ?> <link rel="stylesheet" href="<?php bloginfo('stylesheet_url'); ?>" type="text/css" media="screen" /> <?php } ?>
Better SEO Titles for your pages<?php if ( is_home() ) { include ('filename.php'); } ?><?php if (is_home()) { echo bloginfo('name'); } elseif (is_404()) { bloginfo('name'); echo ' - Oops, this is a 404 page'; } else if ( is_search() ) { bloginfo('name'); echo (' - Search Results');} else { bloginfo('name'); echo (' - '); wp_title(''); } ?> -
Creating Navigation Menu
Menus are an excellent way to create a menu of categories or Pages, highlighting specific areas of interest within your website. Dynamic menu highlighting is a way to give users a reference point with which to navigate. It is like the dot on the map that says "you are here". Nick La created a dynamic highlight menu on Best Web Gallery by using the code below:<ul id="nav"> <li<?php if ( is_home() || is_category() || is_archive() || is_search() || is_single() || is_date() ) { echo ' class="current"'; } ?>><a href="#">Gallery</a></li> <li<?php if ( is_page('about') ) { echo ' class="current"'; } ?>><a href="#">About</a></li> <li<?php if ( is_page('submit') ) { echo ' class="current"'; } ?>><a href="#">Submit</a></li> </ul>
-
Further Reading on Navigation Menu

1)Creating Two-Tiered Conditional Navigation in Wordpress- Here is a common navigational scheme, with parent pages on top and child pages (if they exist) on bottom. 2) Smarter Navigation Menu Mike Cherim has explained how to get a smarter navigation menu using Conditional tags by offering post titles, archive dates, and category names instead of generic terminology.<!--Begin an unordered list the ID is for the bookmark, the class is for the style (so I can have other lists with the same styling as seen on RedScrubs.com)--> <ul id="nav" class="btn"> <!--IF the current page is the 404 page, note the added error class--> <?php if(is_404()) { ?> <li class="current_page_item error"><a href="#">404 Error</a></li> <?php } ?> <!--IF the current page is the search results page--> <?php if(is_search()) { ?> <li class="current_page_item"><a href="#">Search Results</a></li> <?php } ?> <!--IF the current page is a single post--> <?php if(is_single()) { ?> <li class="current_page_item"><a href="#">Selected Article</a></li> <?php } ?>
-
-
Query Posts
Query_posts can be used to control which posts show up in The Loop. All you have to do is place a call to query_posts() in one of your Template files before The Loop begins. Show posts from only one category If you want to display a certain number of posts in specific category
Here we want to display the latest "10" post in category whose ID is "15". Exclude Categories From Your Home Page<?php query_posts('cat=15&showposts=10'); ?>
Retrieve a Particular Post<?php if (is_home()) { query_posts("cat=-3"); } ?><?php // retrieve one post with an ID of 5 query_posts('p=5'); ?>-
Further Readings On Query Posts
1) Query_posts redux- A helpful tutorial to list some of the arguments that you can pass to the query_posts() function.<?php query_posts('page_id=7'); //retrieves page 7 only query_posts('pagename=about'); //retrieves the about page only ?>
-
-
Get Posts
get_postsis a simple tag for creating multiple loops to allow you list links of posts in different ways. For example if you want to display the last 5 entries, you use this code:
In the above code the variable “numberposts=5? tells WordPress how many posts to retrieve and populate the loop with. WordPress post formatting function, setup_postdata() automatically populates the required variables.<?php $previous_posts = get_posts('numberposts=5'); foreach($previous_posts as $post) : setup_postdata($post); ?> <a href="<?php the_permalink(); ?>" id="post-<?php the_ID(); ?>"><?php the_title(); ?></a> <?php the_content(); ?> <?php endforeach; ?> -
Post excerpts
There are two WordPress template tags, the_content() and the_excerpt() used within the WordPress Loop to display the content of the post. Post excerpt allows you to display only the first part of your blog’s post, a block of content instead of displaying the full post. While many don’t know the real reason behind and just use it to make things more aesthetic, displaying excerpt has got many advantages both in the SEO and traffic area. The_excerpt() is used to force only excerpts to be seen on the multi-post pages. Also, HTML tags and graphics are stripped from the excerpt's content. So here is how it works when using <?php the_excerpt(); ?> in the post:- 1) If the post uses both the_excerpt() tag and the explicit excerpt that is written in the textarea box on the write post panel,
Display the explicit excerpt - 2) If the post uses the_excerpt() tag only,
Display 120 words of the post
- 1) If the post uses the <!- -more- -> tag to mark the ending post of the excerpt,
Display this excerpt - 2) If the <!- -more- -> tag is not used,
Display the entire post
-
Further Readings on Post Excerpts
1) Display Post Excerpts Only in WordPress- A good way to ensure your posts don't show up in suplemental results since Google can find them in various places - ensures that the excerpt is shown on all pages except the full post page. 2) Use the More Tag on Wordpress- Many readers prefer to have full posts on the homepage so that they can read the content right there, without needing to click around. A simple solution to accommodate both sides is to use the “more” tag on Wordpress. 3)Custom Excerpts for WordPress 4)Things you should know when using post excerpt- Things you should be knowing and setting up when using post excerpt is described in this article: why use post excerpt?, Different ways of displaying post excerpt, Displaying excerpt on the frontpage, archives and search results page and Displaying full post in feeds.
- 1) If the post uses both the_excerpt() tag and the explicit excerpt that is written in the textarea box on the write post panel,
-
Custom Fields
WordPress has the ability to allow you assign custom fields to a post by adding extra information to the post which give your blog a lot of flexibility. Custom fields have a name and a value. The Key is the name of the custom field and the Value is the value you want to give to that name. You can display this information in posts, pages, sidebars, or anywhere on your site. WordPress remembers previously used custom field names and can be selected in the drop down list. - Getting Custom Field Values
Where $post->ID to get a post's ID, $key is a string containing the name of the meta value you want and $single can either be true or false. If set to true then the function will return a single result, as a string. If false, or not set, then the function returns an array of the custom fields.get_post_meta($post_id, $key, $single); <?php echo get_post_meta($post->ID, 'key name',true) ?> - Adding Custom Field in a post
To illustrate, we’ll start with a very basic example— Lets assume you want to display the author name right below the title of the post and add a direct link to the author's website. For starters, you’ll need to open a new post and add 2 custom fields with their respective values, see the image below.
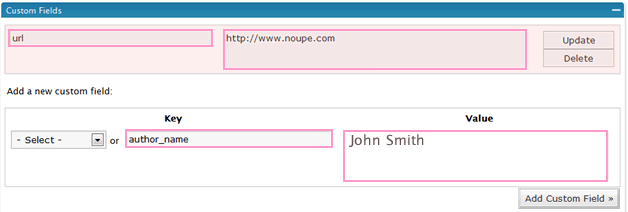
Now you can display these information inside your template file as below:<?php //get author_name (custom field) ?> <?php $author = get_post_meta($post->ID, 'author_name', true); ?> <?php //get author_url (custom field) ?> <?php $url = get_post_meta($post->ID, 'author_url', true); ?> <a href="<?php echo $url;?>"><?php echo $author; ?></a>
-
Further Readings On Custom Fields
1)Using WordPress Custom Fields: Introduction- An ongoing tutorial series for practical uses of WordPress custom fields - 2)WordPress Custom Fields; laying text over your lead graphic- Adding a photo or image behind a posts title can help to lure a reader into viewing the main excerpt / permalink of your post.
-
-
Writing Code in Your Posts
Sometime you might need to add pieces of code like HTML, CSS, PHP, or javascripts in your post and make this code "looks" like code, but "doesn't behave" like code. WordPress.com changes codes such as <, >, &, ", and ' into characters. For example, if you type:
It will erased from your post when you save it. Or it will try to turn the codes into character entity codes, which can really mess some things up. So To make this WordPress template tag code appear, the code must be converted into character entities:<? php query_posts('p=5'); ?> - <? php query_posts('p=5'); ?>
- To Write Code in Your Posts so that it looks like a box of code which may be copied and pasted within other code or template file, you can use the <pre> HTML tag with <code> tag.
-
Further Readings On Writing Code in your Posts
1)Signatures and Writing Code- Lorelle writes an amazing article on posting code in your WordPress.com blogs, listing the most common character codes (character entities) used in HTML/XHTML, PHP, and other programming languages. Also you need to check her other post "WordPress Plugins That Help You Write Code" sharing some of the WordPress Plugins that help you write code and equations in your blogs. - 2)Online Code Converters- There are several online converters that transform the text you type into the standard HTML code that every browser can recognize without altering the character encoding to help you change code into something that WordPress blog can display properly.
- Postable- An ajax online code converter created by "Elliot Swan"
- HTMLizer Data
- HTML Code converter
-
-
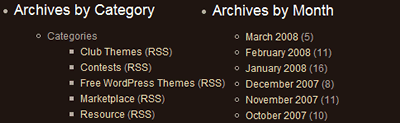
Organized and Structured Archives page
There are many techniques to customize your Archive Index page. Some involve incorporation of plugins or PHP code to create customized lists of archived posts, and others provide more interesting ways of displaying your archives. You can display Archives By Year, month, categories, day, Weighted Categories, etc... The example below illustrats how to create an archives page listed by categories and months.
Where wp_list_cats displays a list of WordPress categories as links and wp_get_archives displays a date-based archives list. If you want to retrieve every single page (perhaps for a custom archive page or a full article listing), you can set this to -1.<?php while(have_posts()) : the_post(); ?> <h2><?php the_title(); ?></h2> <ul><?php wp_list_cats('sort_column=name&optioncount=1') ?></ul> <ul><?php wp_get_archives('type=monthly&show_post_count=1') ?></ul> <?php endwhile; ?><?php query_posts('posts_per_page=-1'); //to return all the posts without pagination ?>
-
Further Readings On WordPress Archives page
1)How to Create An Archives Page- Here’s how to create an archives page for archive links listing by categories and months. 2) Creating an Archive Index 3)Wicked WordPress Archives in One Easy Step!- How to Create Archives with Real Sex Appeal
-
-
Permalinks
Setting your desired Permalinks structure is the first thing you should do after installing your WordPress blog because search engines index your blog based on post URLs and if you change from one to another then you will loose your rankings. You can change the Permalinks setting through Admin > Options > Permalinks. WordPress has to option to use pretty links, turning the numbered links into sentences. So instead of the default ugly permalink
Use the Pretty Link structurehttp://example.com/?p=Nhttp://example.com/category_name/post-name or http://example.com/year/month/day/post-name
-
Further Readings On Permalinks Structure
1) Configuring WP Permalinks- Weblog Tools Collection has a useful guide on setting up permalinks on your WordPress blog and how to set up a .htaccess file if you don’t have one. 2) Understanding WordPress Permalinks- Which Permalink Structure Is the Best?
-
-
Identifying author(s) & guest comments and styling them
Through intelligent use of CSS, you can exercise absolute control over author and guest comment layout, presenting the reader with comments so rich with style. 1)How to highlight author comments in WordPress- By default, most themes have comments look the same. Matt Cutts show us a simple: instead of checking the author’s email address, check their user id to see if it’s the user id of the blog owner.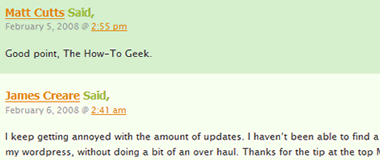
2)How-to style WordPress author comments- Here you will be able to identify author(s) & guest comments under WordPress without the need for extraneous plugins, giving you some extra flexibility by adding code to check if the commenter’s email is the same as the email address of the blog’s author.
3) Styling Your WordPress Comments- Here are three examples to design the guest comments which complements the rest of the site using: Gravatars, Speech Bubble and Alternating Arrows.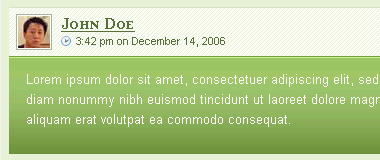
-
Separating Trackbacks from Comments
Trackbacks are the messages displayed in the comments list whenever another blog links back to one of your posts. It is best if they are not mixed with the comments.
1) Separating Trackbacks from Comments- The method described here will lift out all of the trackbacks, and then display them as a numbered list after the list of comments is finished. 2) Managing Trackbacks and Pingbacks- This topic covers separating trackbacks/pingbacks from regular comments, and also how to remove trackbacks and pingbacks from a WordPress theme completely. -
Custom 404 Page
Reconsider the value of your 404 page by thinking of it as your home page. Think of it as a gateway to your site, you will find good ideas here: 1)Customizing Your 404 Page- You can often retain the traffic that comes to your 404 page by either offering something funny to grab the readers attention or by offering a variety of methods for them to find the post they are looking for. 2)Customize Your 404 Page- Here are some tips for improving your 404 page on your personal (or even professional) website. -
Gravatars
After you sign up for Gravatars service, every time you leave a comment at a blog with your valid email address, your image will appear next to your name, providing the owner has added a few simple lines of code. How to Setup Gravatars for your Blog - Plug-in Free!- This is a guide custom tailored for WordPress users to setup gravatars on their blog without using a plug-in -
Worth Checking Techniques
1) When Your WordPress Theme Keeps Reverting To Default- Have you ever been working on your WordPress blog’s design, when you refresh the page only to find that it’s decided to revert to the default theme?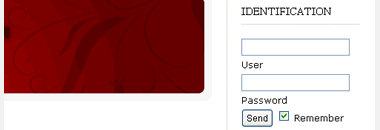
2) How to place a login form in the sidebar- Want to get your users log in through the front page, Small Potato's tutorial will show you how. 3) When Your WordPress Theme Keeps Reverting To Default- Have you ever been working on your WordPress blog’s design, when you refresh the page only to find that it’s decided to revert to the default theme?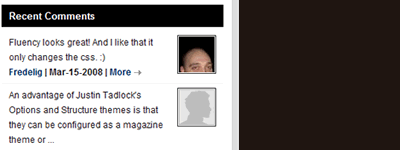
4) Adding Recent Comments To Your WordPress Theme- Displays recent comments in the sidebar without the need for a plug-in:
5) Creating your home.php quite easily on WordPress- Two easy ways to use if you just want a static front page on your blog.
6) Even Simpler WordPress Contact Form- A simple solution for all your contact form needs. All comments left with this form are displayed in your WordPress administration panel.
7)WP Date Image Hack- Using dynamic images to replace the date entries of your blog post.
8 ) Category Page Hacks- These 2 hacks will increase the usability of WordPress category pages by giving an index of posts instead of a paged overview, and by sorting posts by title instead of post date.
9)Creating a “dynamic sticky”- When we need to have certain articles ’stay at the top’ longer than others.
10)Show Category Images- How to add some simple PHP code to your WordPress template and make linked images appear instead of text for your categories in posts.
11) Displaying WordPress Entries on static pages- A simple solution to include the date, headline, and excerpt of the latest entry from your Blog into your website static pages.
12) Ajax Commenting- How to make your commenting system submit comment without reloading the whole page. 13) Opening Links in New Windows- This hack is for those who want to open links in a new browser window and don't want to type out target="_blank" every single time. -
Developing a WordPress Theme
1)So you want to create WordPress themes huh?- A step by step guide to create a WordPress theme from scratch.
2) Developing a WordPress Theme- Dezinerfolio wrote a tutorial on how to develop a WordPress theme, you will learn to convert your xHTML CSS site into a Compact WordPress Theme.
3)How to create WordPress theme?- DevBox Wireframe WordPress theme, which is available for download on their site. This is basically a barebones theme that you can use to easily take a XHTML/CSS layout and convert it into a WordPress theme. 4)Widgetizing Themes- Technical instructions on updating a theme for use with widgets.
This is one of the best reference posts ever. I had it bookmarked when it was first published and again, today, as I was updating my theme, I used it again. Thank you!
A great tutorial. I found many good things that I can apply for my site I’ve developed with wordpress. Thanks a lot.
hello, i just wanna ask if you could provide a code that will trim and show only the text beetween [p] theText Here [/p].. also, a code that will show the text which has a beginning of a word ‘Price’
e.g: post text… Price: $23.99…text text…
the output will be, $23.99
thanks in advance, cheers!
The web site you are trying to access:
atozmp3.net/
is listed as a site within the category:Hacking
and is not accessible because of one of the following reasons:
1. Organisation’s Internet Access Policies
2. You have not logged in to the Windows domain
3. You don’t have permissions to access Internet
How to access all sites in my PC….
good things that I can apply for my site I’ve developed with wordpress. Thanks a lot.