DIY Tutorials (Not Just) for Web Designers: Create Explainer Videos Easily

You find creating explainer videos tempting, but don't think you can do it? Well, you're a web designer, and I'm sure you've already made a few animated design elements come to life. There's room for improvement, and it's called simpleshow.
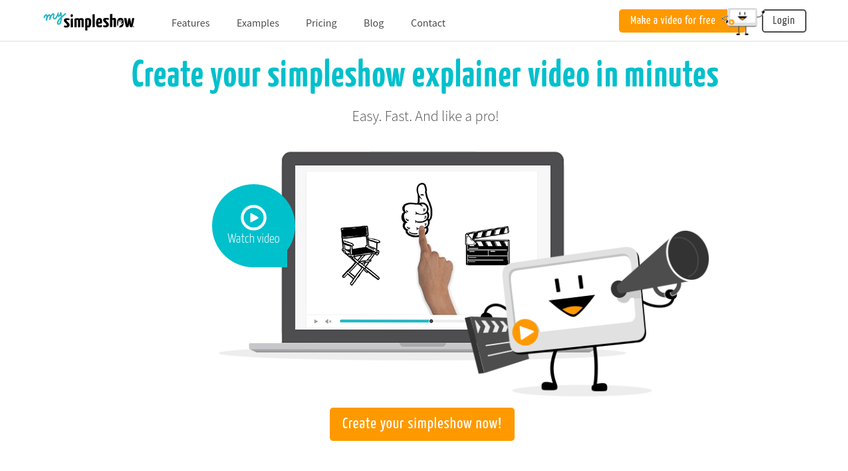 simpleshow: Landing Page. (Screenshot: Noupe)[/caption]
All you need is a good idea for something you've always wanted to explain to the world. If you have no way to get to the spark of innovation, you can always take inspiration from one of the many examples that simpleshow provides you with in advance.
simpleshow is an offshoot of the professional video producers of simpleshow. While their product offers full service, the creators have now opened a bit of their toolbox for ambitioned DIYers. Of course, the options are limited in comparison, but simpleshow is still a lot more powerful than PowerPoint, or any other simple presentation solution. The films created with simpleshow are especially alluring because they don't need any further explanation. Instead, like any other flic, they can be viewed by the user independently.
The solution is aimed at everyone. The skills level of the potential user surely dictates the result to an extent. However, it is not like you needed expert knowledge in video production to use the product.
The approach is similar to the one you know from PowerPoint or Keynote. You create individual screens, called slides in PowerPoint, and called scenes in simpleshow. Then, you place corresponding graphics in these scenes. In contrast to PowerPoint, you don't write your story into the visible parts of the scenes.
Instead, your story is spoken alongside the images. Write your story, divided into scenes. Then, simpleshow takes the text, analyzes it, and suggests keywords for which the service also searches out appropriate imaging, placing it in the scene.
Both the keywords and the selected images can be changed freely. The only restriction is that there's a limit of seven keywords per scene. Otherwise, the scene would be a bit crowded as it is.
Once you've placed your images on the scene, choose one of the narrator voices that will read the story in the video. The individual graphics are moved onto the screen by hands.
Aside from the pre-defined graphics, and the automatic voices, you can upload your own images, as well as read the text yourself. Of course, relying on the system is faster.
In about 20 minutes, I have created the following video. If you keep in mind that I didn't even have an idea to base my video on, the result is not that bad for a spontaneous project.
The images suggested by the system have mostly been left untouched, although the gallery would have allowed for lots of variation due to its respectable size. However, to me, this was about finding out how quickly I can get results. I was willing to make some compromises. Here's my masterpiece:
[evp_embed_video url="https://www.noupe.com/wp-content/uploads/2018/03/mysimpleshow-explainervideos.mp4"]
In terms of pricing, simpleshow is not on candy bar levels. You can create your video for free. However, if you do, you can only use it for private purposes, like a cracker-barrel, or a child's birthday party. As soon as you want to use your videos professionally, like on your website, you need one of the paid accounts. The so-called fun account won't get you any further.
Here's where the business plan starts, costing you 129 Euro a month, or 79 Euro a month with annual payment. The even better equipped Pro plan sits at 499 a month with monthly, and 399 Euro a month with annual payment. For very extreme usage, there's an enterprise version with a price you need to discuss with the creators.
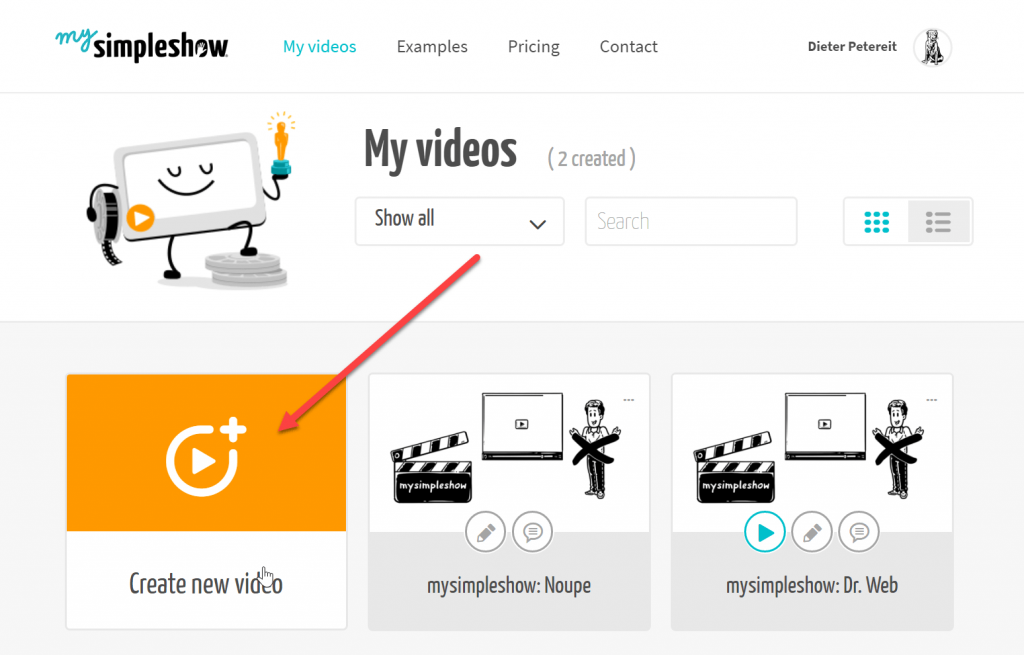 Here, click on "Create new video", which takes you to this step:
 This is where you name your video, and select the language you want the video to be in. The options are English or German. The classic method of further creating the video should be a click on "Write your own Script".
However, simpleshow also allows you to import PowerPoint presentations, which you can then use as a basis for your film. I clicked to write my own script:
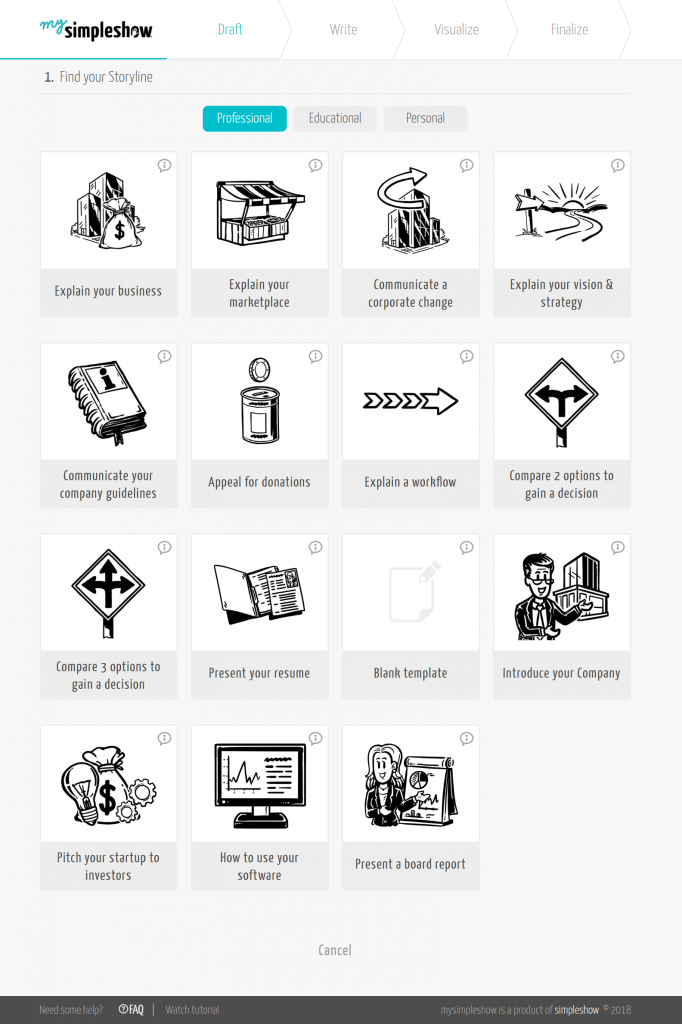 If you're already comfortable with the tool, you may consider using an empty template. I didn't. Instead, from the collection of templates, I picked the one that deals with "how to use your software":
 Between the individual editing steps, simpleshow always explains what to expect in the following step, and how to approach it, in proper style, using an explainer video. This automatism can also be deactivated in the settings. At first, it will definitely help you, even if using simpleshow is not very complicated as it is.
The template we chose works with seven scenes. Of course, you're not limited to this. You can always add more. Even a finished story can be subdivided during the editing process. Small example texts on the right of your text cards fuel you with ideas on wording and length.
Once you're done with your story, click on "Choose visuals". Now's the time for artificial intelligence. Simpleshow analyzes your text, adds keywords, and image suggestions for the keywords:
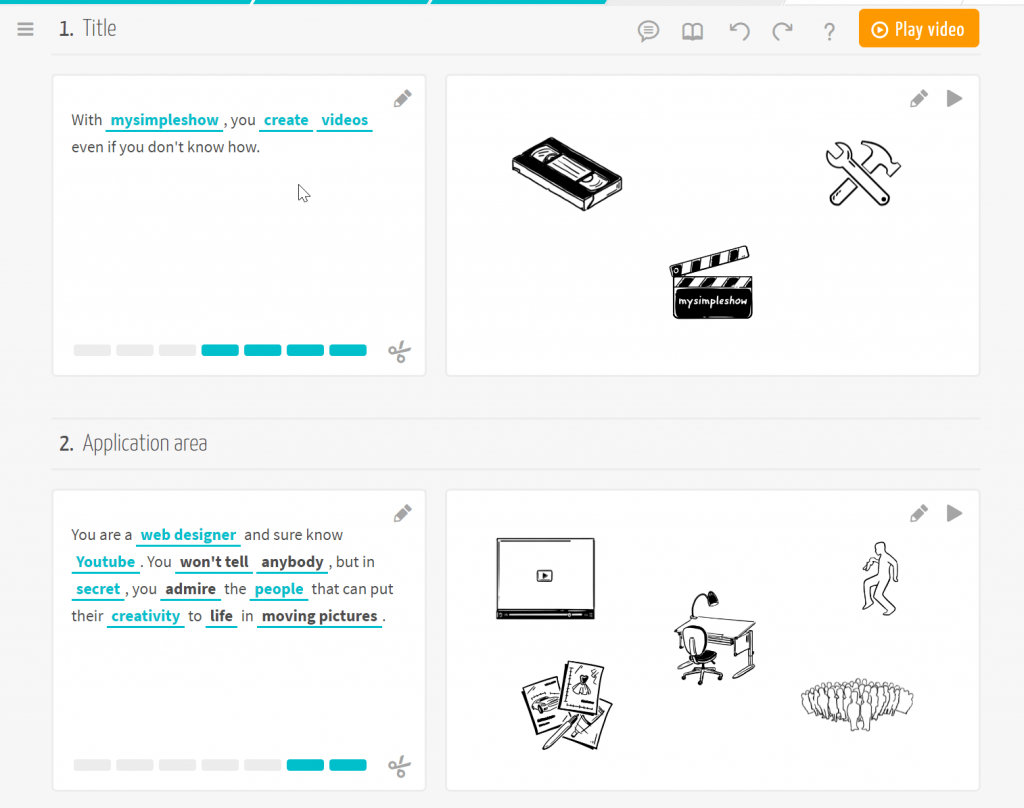 The terms highlighted in blue are the keywords, with the according image suggestion being on the right of the text card. While there is a suggestion for the bold black ones, the suggested image is not visible on the card. The blue bars at the bottom border of the card show you how many keywords you can use on the respective card. Use them by dragging a bar onto a term that you want to turn into a keyword.
Clicking one of the blue words opens an overlay where you can swap the respective image out for a different one. However, if you want to change the size and order of the graphics, click on the pencil icon at the top right of the card with the illustrations. Doing the same on the text card lets you edit your text.
Once you're happy with your scenes, click on "Choose Audio", which takes you to this screen:
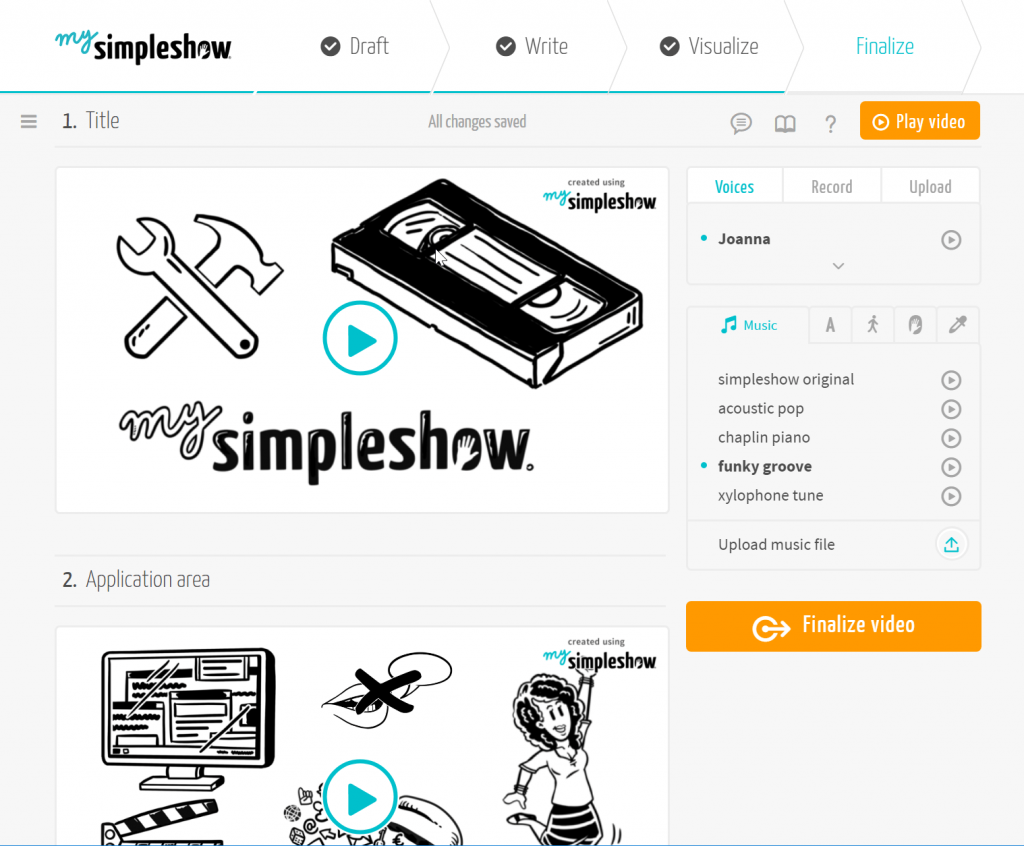 Depending on the selected plan, you have different options. The fun plan puts you in the situation at hand. The most important choice you have to make is who should read your story. You get to choose from three female and three male voices. Or you go ahead and narrate the story yourself.
It is also possible to embed background music, and implement subtitles. If everything suits you, click on "Finalize Video". Now, simpleshow takes a bit of time to complete your video. You don't have to stay on the service for that. You'll receive an email once the process is finished.
Now, share your video on different social networks, or download it to use it on your website:
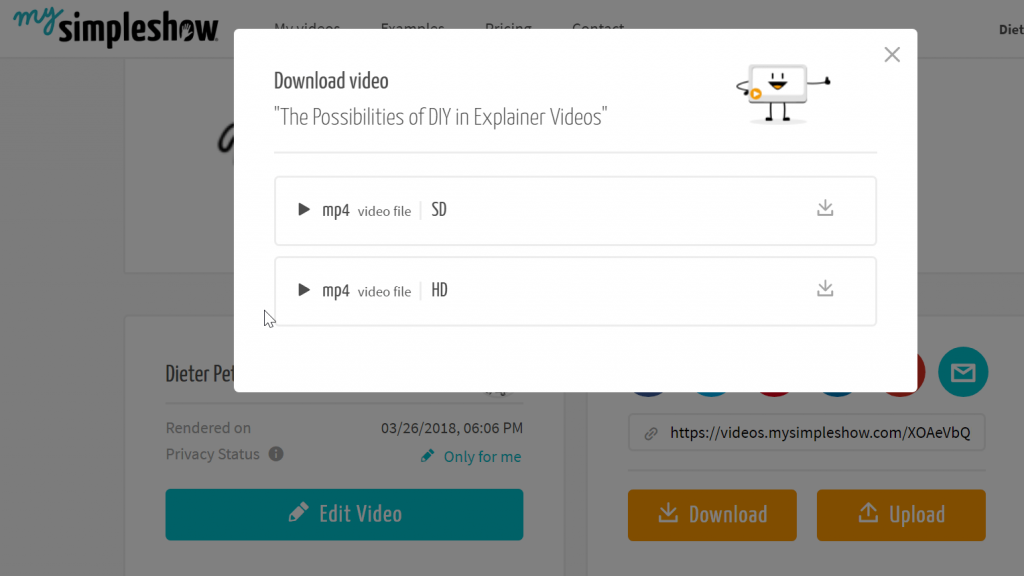 Of course, it is important to pay attention to the license conditions, meaning you need to make sure to book the right plan. Feel free to read that section again.
As you can see, simpleshow is not rocket science, as far as using it goes. I don't know another service that gets you to appealing results that quickly. Using your own images, as well as your own voice, you can work even more flexible.
Whether the result is worth the monthly cost is up for you to decide. I definitely recommend an in-depth test. simpleshow is fun for sure!
Featured image by Jan Vašek from Pixabay
Quickly Create Explainer Videos With simpleshow
We all know these animated tutorials where someone manually slides pictograms and illustrations into the visible area, while a voiceover explains what is shown. The rather new service simpleshow lets you create this exact type of explainer video in a DIY process. [caption id="attachment_104327" align="aligncenter" width="848"] simpleshow: Landing Page. (Screenshot: Noupe)[/caption]
All you need is a good idea for something you've always wanted to explain to the world. If you have no way to get to the spark of innovation, you can always take inspiration from one of the many examples that simpleshow provides you with in advance.
simpleshow is an offshoot of the professional video producers of simpleshow. While their product offers full service, the creators have now opened a bit of their toolbox for ambitioned DIYers. Of course, the options are limited in comparison, but simpleshow is still a lot more powerful than PowerPoint, or any other simple presentation solution. The films created with simpleshow are especially alluring because they don't need any further explanation. Instead, like any other flic, they can be viewed by the user independently.
The solution is aimed at everyone. The skills level of the potential user surely dictates the result to an extent. However, it is not like you needed expert knowledge in video production to use the product.
The approach is similar to the one you know from PowerPoint or Keynote. You create individual screens, called slides in PowerPoint, and called scenes in simpleshow. Then, you place corresponding graphics in these scenes. In contrast to PowerPoint, you don't write your story into the visible parts of the scenes.
Instead, your story is spoken alongside the images. Write your story, divided into scenes. Then, simpleshow takes the text, analyzes it, and suggests keywords for which the service also searches out appropriate imaging, placing it in the scene.
Both the keywords and the selected images can be changed freely. The only restriction is that there's a limit of seven keywords per scene. Otherwise, the scene would be a bit crowded as it is.
Once you've placed your images on the scene, choose one of the narrator voices that will read the story in the video. The individual graphics are moved onto the screen by hands.
Aside from the pre-defined graphics, and the automatic voices, you can upload your own images, as well as read the text yourself. Of course, relying on the system is faster.
In about 20 minutes, I have created the following video. If you keep in mind that I didn't even have an idea to base my video on, the result is not that bad for a spontaneous project.
The images suggested by the system have mostly been left untouched, although the gallery would have allowed for lots of variation due to its respectable size. However, to me, this was about finding out how quickly I can get results. I was willing to make some compromises. Here's my masterpiece:
[evp_embed_video url="https://www.noupe.com/wp-content/uploads/2018/03/mysimpleshow-explainervideos.mp4"]
In terms of pricing, simpleshow is not on candy bar levels. You can create your video for free. However, if you do, you can only use it for private purposes, like a cracker-barrel, or a child's birthday party. As soon as you want to use your videos professionally, like on your website, you need one of the paid accounts. The so-called fun account won't get you any further.
Here's where the business plan starts, costing you 129 Euro a month, or 79 Euro a month with annual payment. The even better equipped Pro plan sits at 499 a month with monthly, and 399 Euro a month with annual payment. For very extreme usage, there's an enterprise version with a price you need to discuss with the creators.
Create a Video Hit Step by Step
In order to show you how easy it is to create a video, I'll walk you through the different steps to a complete video. For that, I have used the features of the fun plan. First, create an account via OAuth using Google or Facebook. If you prefer the conventional way, that is possible too. Once you're logged in, you're looking at this screen: Here, click on "Create new video", which takes you to this step:
 This is where you name your video, and select the language you want the video to be in. The options are English or German. The classic method of further creating the video should be a click on "Write your own Script".
However, simpleshow also allows you to import PowerPoint presentations, which you can then use as a basis for your film. I clicked to write my own script:
 If you're already comfortable with the tool, you may consider using an empty template. I didn't. Instead, from the collection of templates, I picked the one that deals with "how to use your software":
 Between the individual editing steps, simpleshow always explains what to expect in the following step, and how to approach it, in proper style, using an explainer video. This automatism can also be deactivated in the settings. At first, it will definitely help you, even if using simpleshow is not very complicated as it is.
The template we chose works with seven scenes. Of course, you're not limited to this. You can always add more. Even a finished story can be subdivided during the editing process. Small example texts on the right of your text cards fuel you with ideas on wording and length.
Once you're done with your story, click on "Choose visuals". Now's the time for artificial intelligence. Simpleshow analyzes your text, adds keywords, and image suggestions for the keywords:
 The terms highlighted in blue are the keywords, with the according image suggestion being on the right of the text card. While there is a suggestion for the bold black ones, the suggested image is not visible on the card. The blue bars at the bottom border of the card show you how many keywords you can use on the respective card. Use them by dragging a bar onto a term that you want to turn into a keyword.
Clicking one of the blue words opens an overlay where you can swap the respective image out for a different one. However, if you want to change the size and order of the graphics, click on the pencil icon at the top right of the card with the illustrations. Doing the same on the text card lets you edit your text.
Once you're happy with your scenes, click on "Choose Audio", which takes you to this screen:
 Depending on the selected plan, you have different options. The fun plan puts you in the situation at hand. The most important choice you have to make is who should read your story. You get to choose from three female and three male voices. Or you go ahead and narrate the story yourself.
It is also possible to embed background music, and implement subtitles. If everything suits you, click on "Finalize Video". Now, simpleshow takes a bit of time to complete your video. You don't have to stay on the service for that. You'll receive an email once the process is finished.
Now, share your video on different social networks, or download it to use it on your website:
 Of course, it is important to pay attention to the license conditions, meaning you need to make sure to book the right plan. Feel free to read that section again.
As you can see, simpleshow is not rocket science, as far as using it goes. I don't know another service that gets you to appealing results that quickly. Using your own images, as well as your own voice, you can work even more flexible.
Whether the result is worth the monthly cost is up for you to decide. I definitely recommend an in-depth test. simpleshow is fun for sure!
Featured image by Jan Vašek from Pixabay

to learn digital marketing course in Delhi visit our website: https://www.nsim.in/
also visit http://www.millionfacesflex.in/ to know amazing facts about celebrities