Create a Business Icon from Scratch an Adobe Illustrator Tutorial
Business icons are one of the most poplar vector illustrations. As with all vectors in general, business icons are scalable which makes them perfect for use in web design. The best way to create an icon is to use one of the vector based programs, such as Adobe Illustrator, Corel Draw, etc. We are going to create an interesting business icon that consists of two arrows and a globe in this Adobe Illustrator tutorial. The techniques we are going to describe is applicable for creation other kinds of illustrations as well.
So, let's get down to business.
This is what we will be creating.
 Creating the Globe
Before we create the globe we need to prepare a grid of parallels and meridians. It means we have to prepare the symbol that we'll apply to the globe. The Blend Tool will help us do that.
Grab the Line Tool (
 Select the Direct Selection Tool (
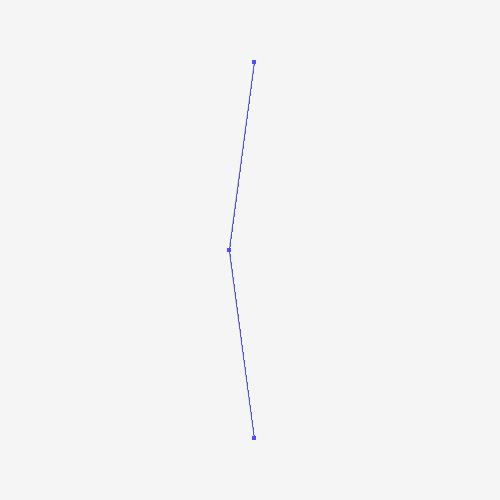 This way we have created a sharp corner. We need to smooth it out. Grab the Convert Anchor Point Tool (
 Select the path and under Object select Transform > Reflect. Set the Axis to Vertical and hit the Copy button. It will create a mirror image of our path. Move the new path to the right (Shift for straight dragging).
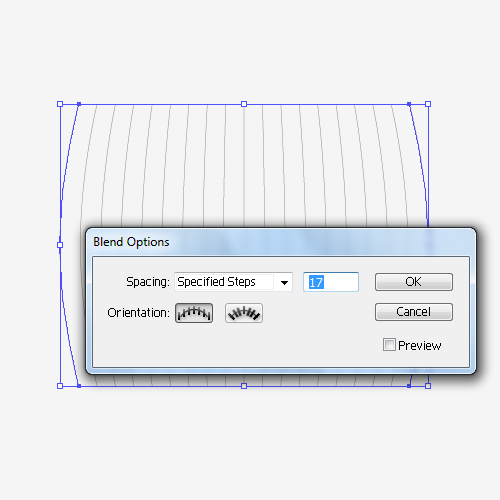
 Select both paths and under Object select Blend > Make. It will create more paths in the middle. To specify the exact number of the paths open Blend Options (Object > Blend > Blend Options). We'll set the value for the Specified Steps to
  Grab the Line Tool (
 Duplicate (
 Select both horizontal lines and under the Object select Blend > Make. Set the value for Specified Steps to
  Select all the elements we've created so far and Group them (
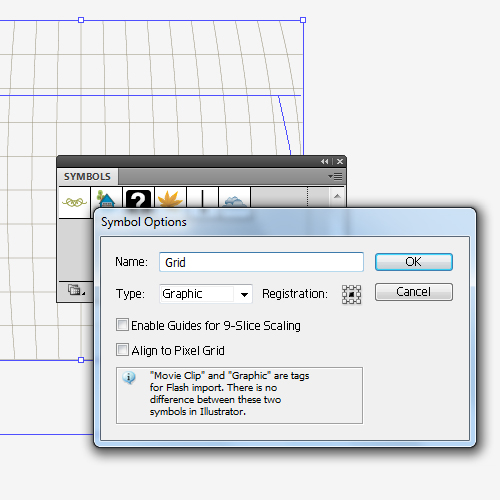 Now we have created a symbol which we'll use to apply to our globe.
Creating the Globe
First of all, we have to create a circle. Grab the Ellipse Tool (
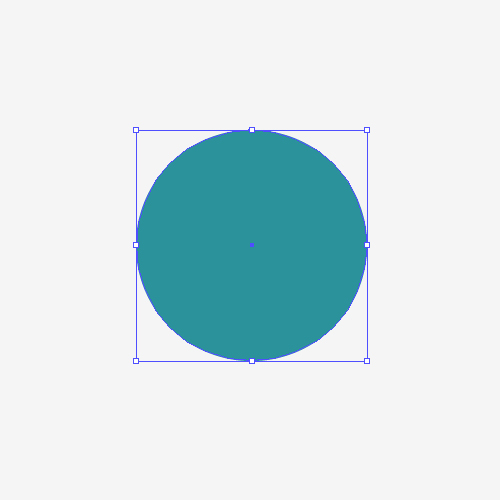 With the Direct Selection Tool (
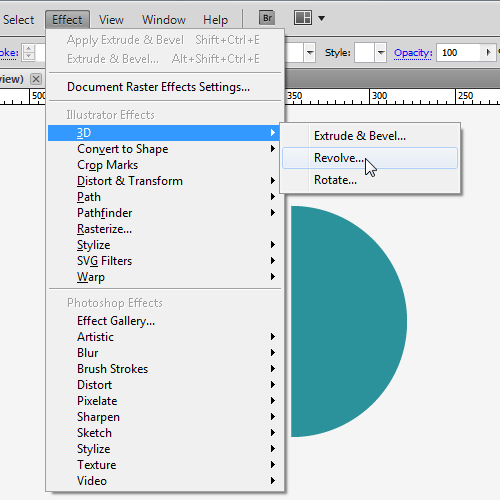
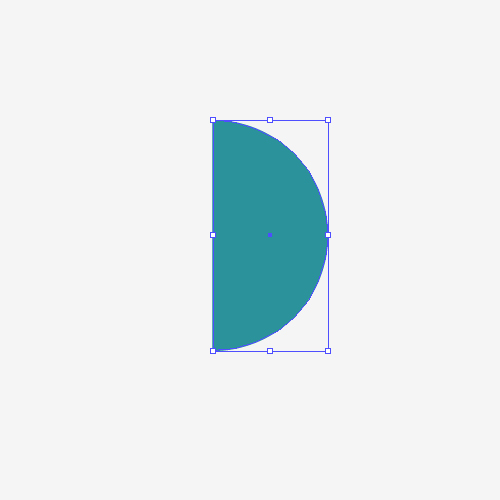 Under Effect select 3D > Revolve.
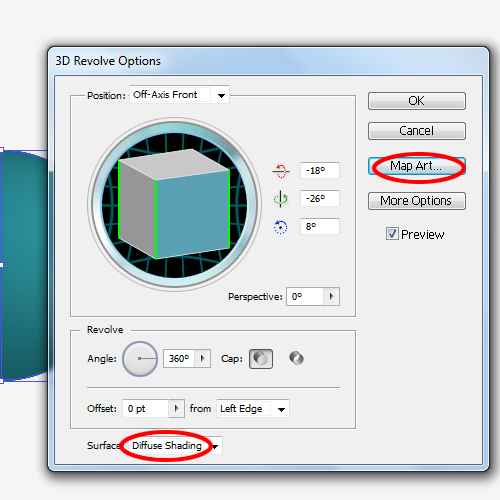
 Under the 3D Revolve Options box make sure to set the Surface to Diffuse Shading and then hit the Map Art button. This is the where we are going to apply the symbol we created to our sphere.
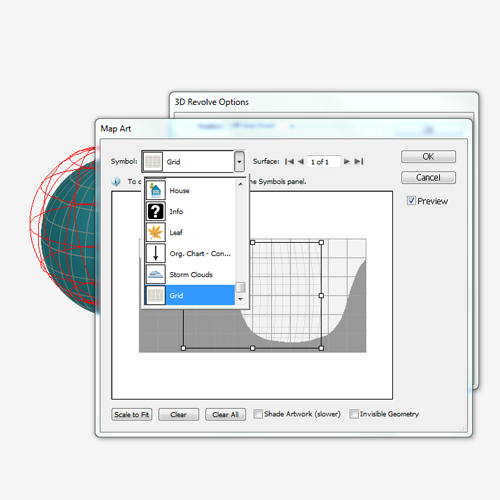
 In the Symbol drop down Menu select the symbol of the grid we have already made. Make sure to hit Scale to Fit button. It will apply the grid symbol properly.
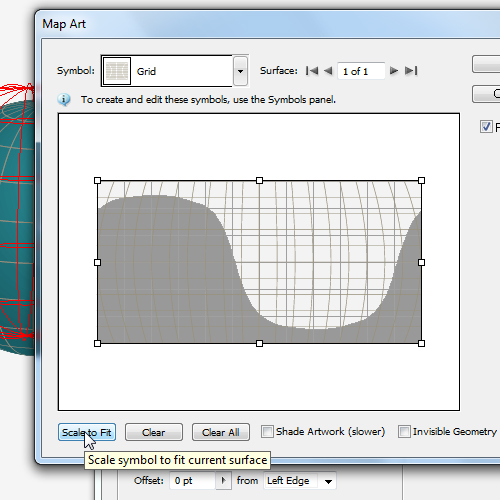 You should end up with something like this.
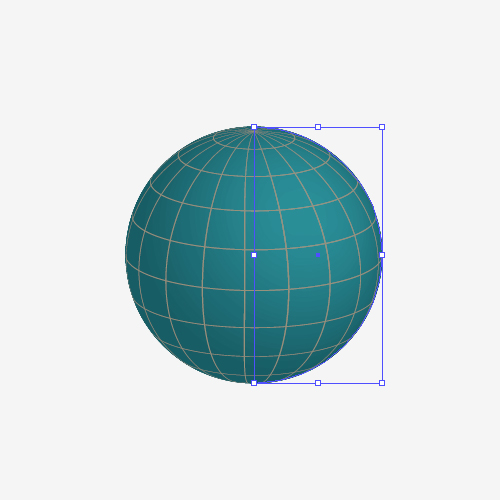 Now we need to apply some nice color gradients. To be able to do that, first we have to turn our object into editable shapes. Under Object select Expand Appearance. Then we need to Ungroup (
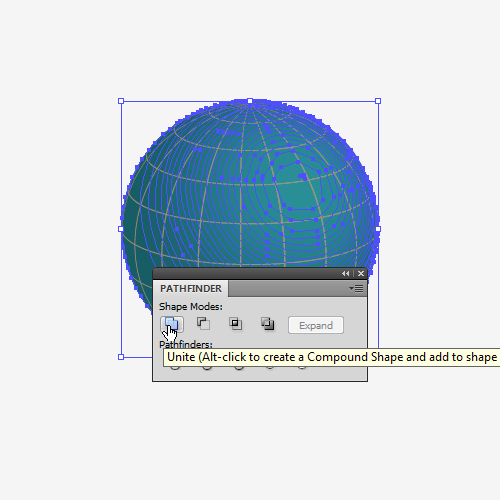 Set the Fill color for the grid to
  We are going to apply a nice blue radial gradient to the circle. It will turn our circle into a nice blue sphere.
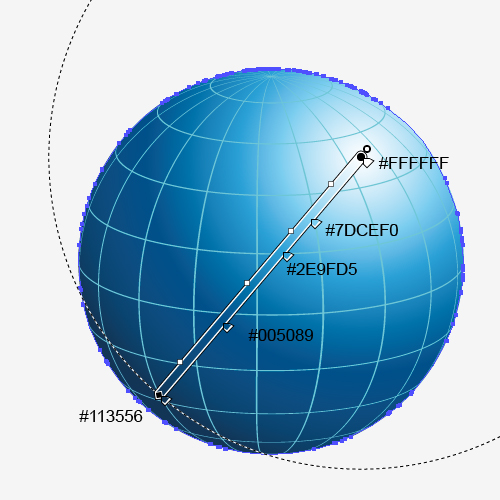 There is one more thing we should add to the globe. Select the Rectangle Tool (
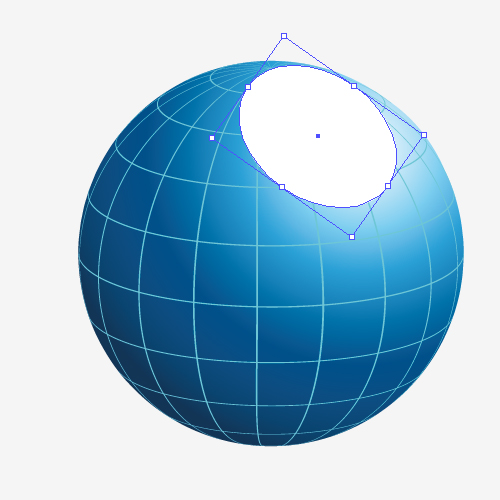 Set the Opacity of the new ellipse to
 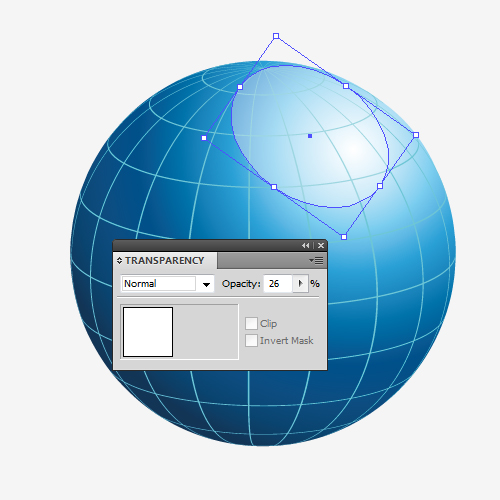 Our globe is ready for some nice arrows. Before we create them don't forget to Group (
 Creating the Arrows
To create nice 3D arrows we will be using 3D effect Revolve. It will help us to fold the arrow around the globe. So, lets get started. First we will create the shape of the arrow.
Grab the Rectangle Tool (
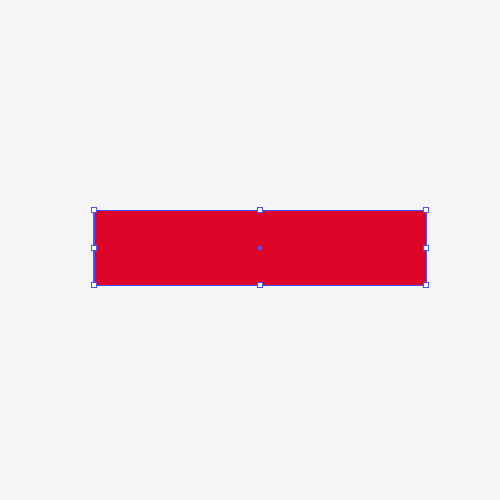 Now, grab the Star Tool from the Tool Panel and click on the Artboard. The Star Options window will pop up. Set the value for Points to
 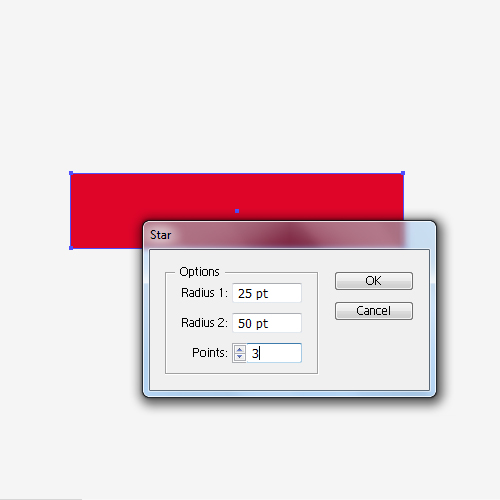 It will create a triangle. Rotate it and place it as it show on the picture below. Align the shapes by using Vertical Align Center under the Align Panel.
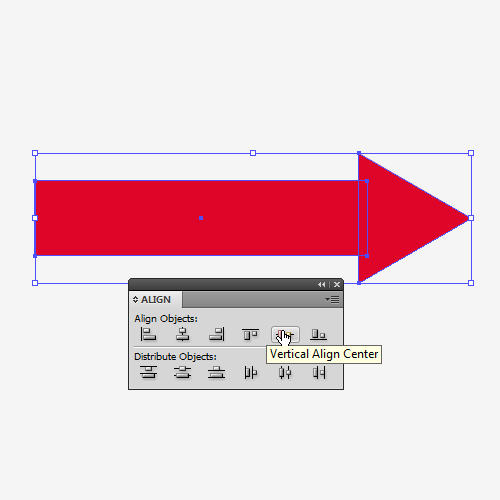 When you are satisfied with the result under the Pathfinder Panel hit the Unite button. It will turn both shapes into the arrow shape.
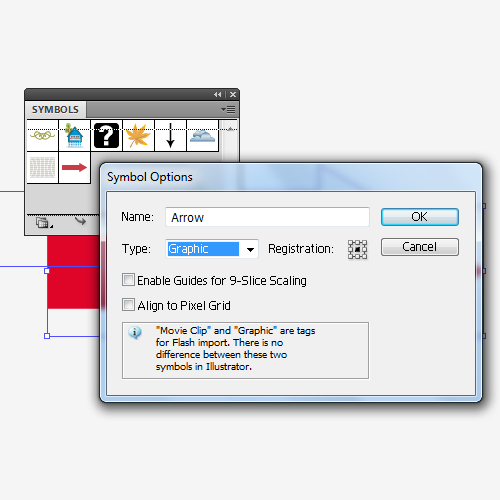
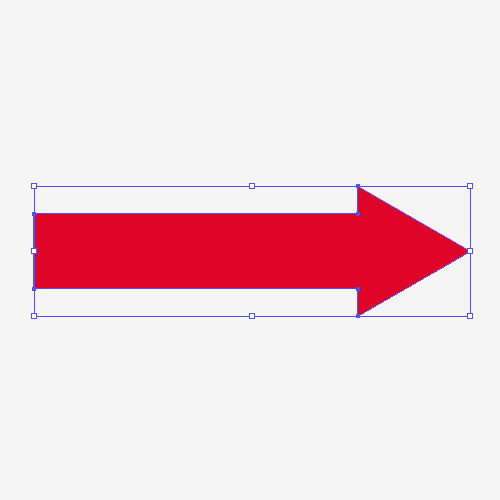 Drag the arrow to the Symbol Panel and name it Arrow. Set the Type to Graphic. This way we are creating the symbol of the arrow which we'll be using later.
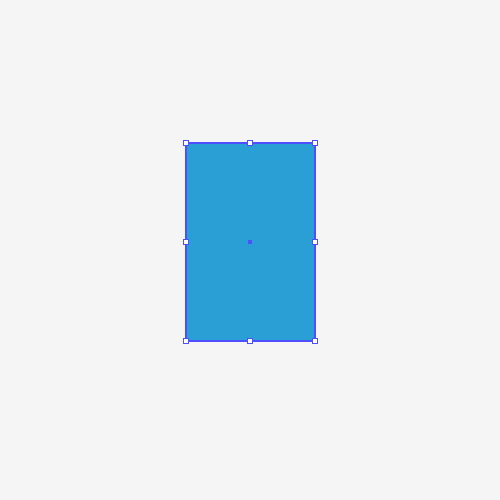
 Now, grab the Rectangle Tool (
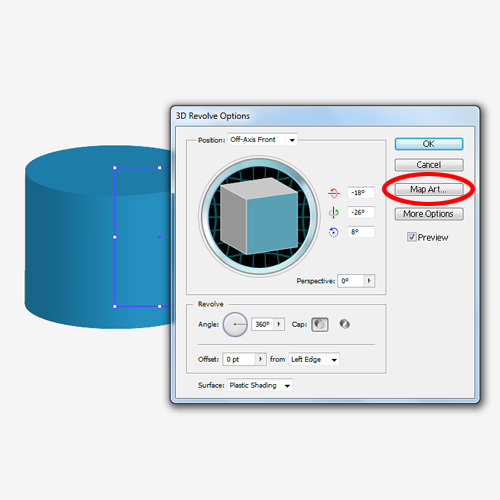
 Under the Effects select 3D > Revolve. Check the Preview box in order to be able to see what are we doing. Under the Revolve Options box click on the Map Art button.
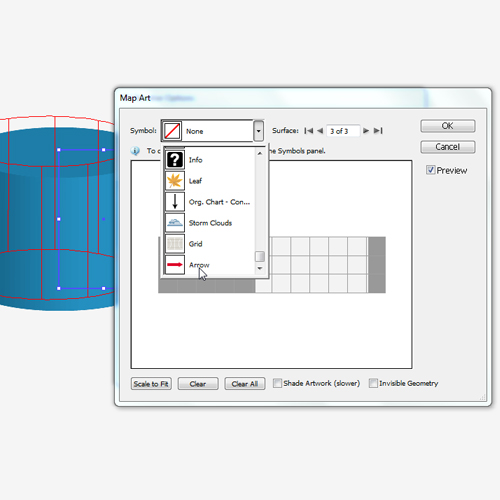
 You will notice that the cylinder contains three sides. Upper ellipse, lower ellipse and the lateral side of the cylinder. Switch between sides, and when you select the lateral side of cylinder select the arrow in the drop down menu for Symbol. Also, make sure to check Invisible Geometry. It will remove the cylinder shape and only the arrow will be visible.
 Feel free to play with the size and the rotation of the arrow, until you reach the right angle and position.
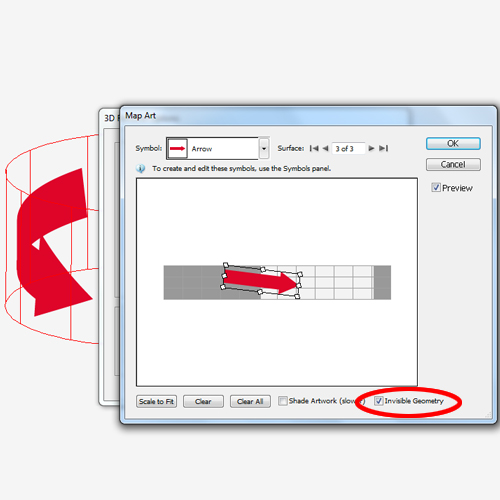 When you reach a desirable result hit the OK button. We can also change the rotation of the invisible cylinder in order to find the best position for our arrow by rotating the cube in the 3D Revolve Options box.
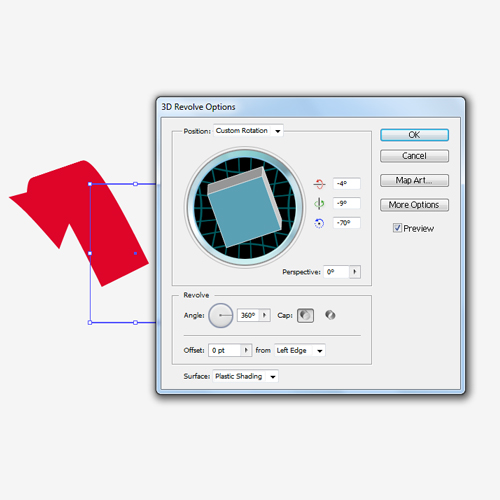 Now we have to turn our arrow into an editable shape. Select the shape with the arrow and under Object hit Expand Appearance. You should end up with something like this.
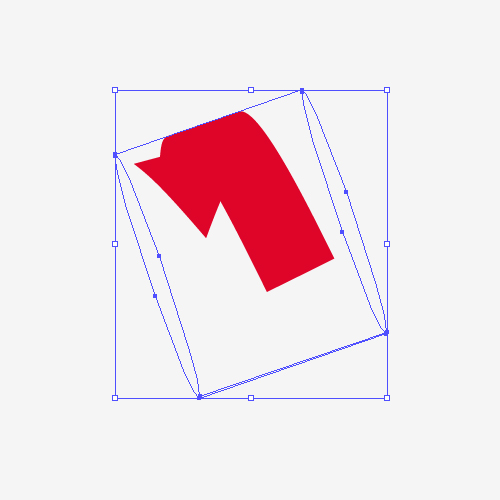 Lets Ungroup (
 Take a good look at the arrow. See if there are any unnecessary anchor points and remove them.
Now we have to turn the arrow into a 3D shape. Select both parts of the arrow and duplicate them (
 We have to connect some shapes now. Grab the Add Anchor Point Tool (
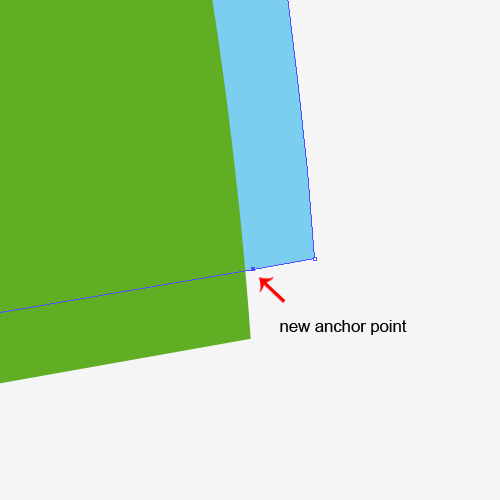 With the Direct Selection Tool (
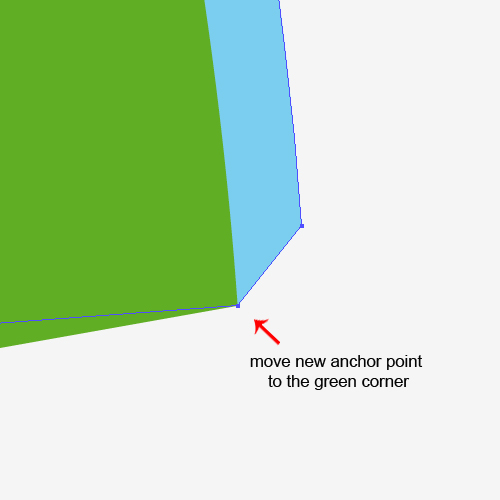 Repeat this step for the other corners of the arrow as well.
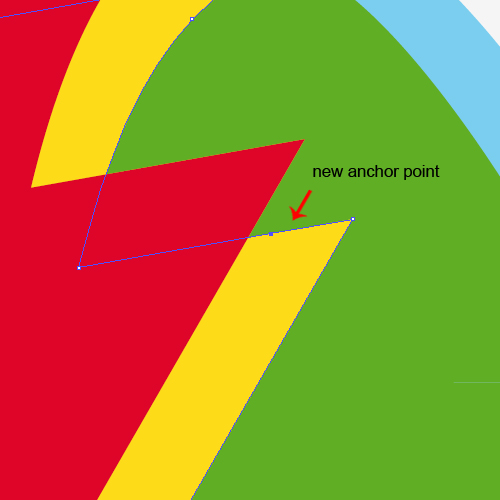
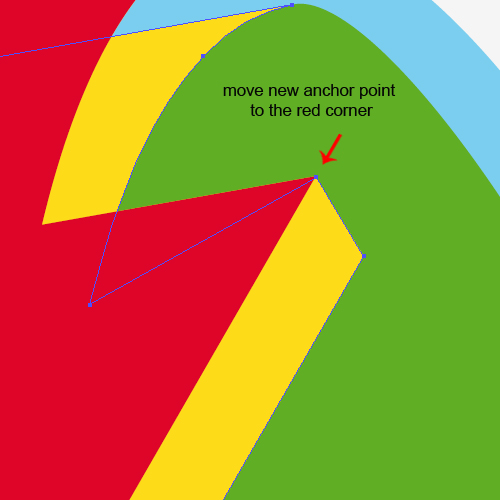
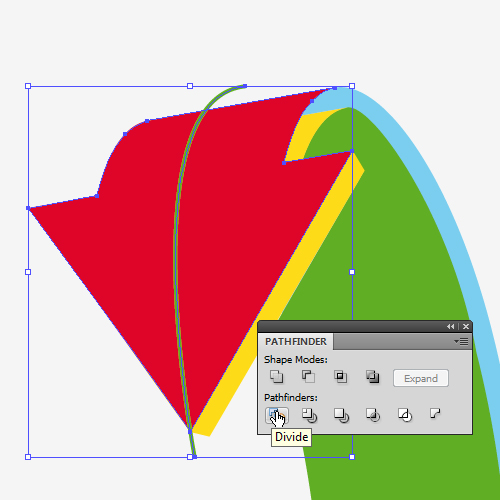
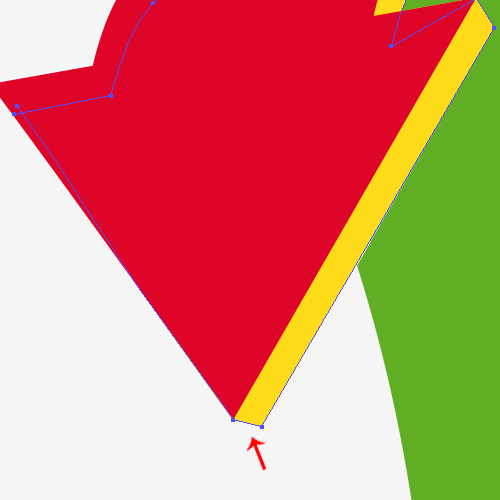 To be able to create a glossy arrow with lots of reflected parts, we'll have to divide some parts of the arrow. Select the Pen Tool (

 And, now our arrow is ready to get some nice colors.
Applying the Color Gradients
In this part of the tutorial we will try to achieve a nice glossy look for the arrow.
To start we will apply some nice linear gradients.
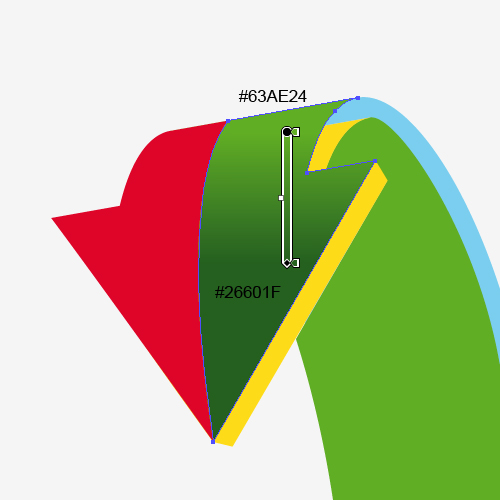
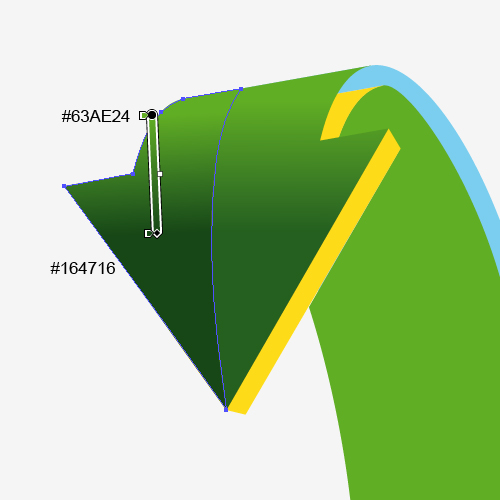 Use a radial gradient for lateral side.
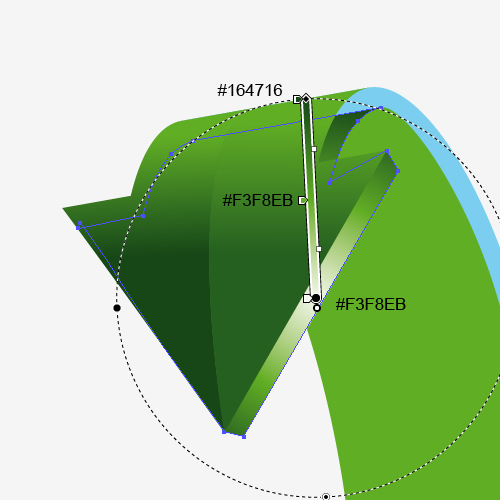
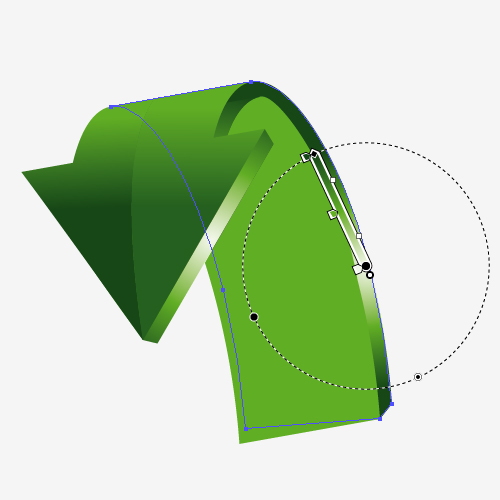 We can also divide the inner part of the arrow. Just create another path using the Pen Tool (P) and divide the inner side of the arrow. Apply a nice radial gradient to both sides.
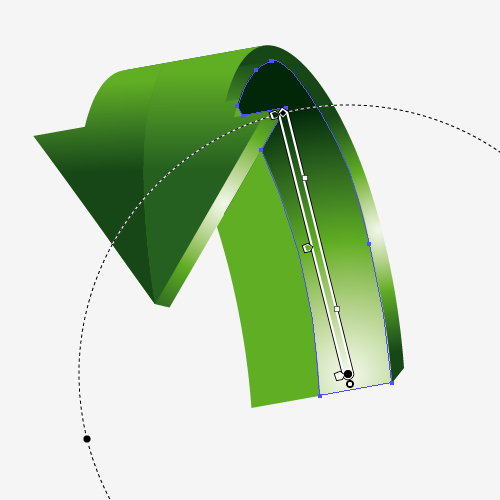
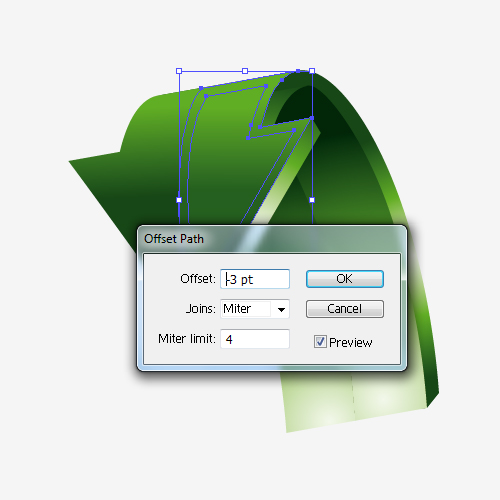
 We can also make some additional shapes that will help us to create the glossy look of the arrow. Select the right upper side of the arrow and under Object select Path > Offset Path. Set the value for Offset to
  With the Direct Selection Tool (
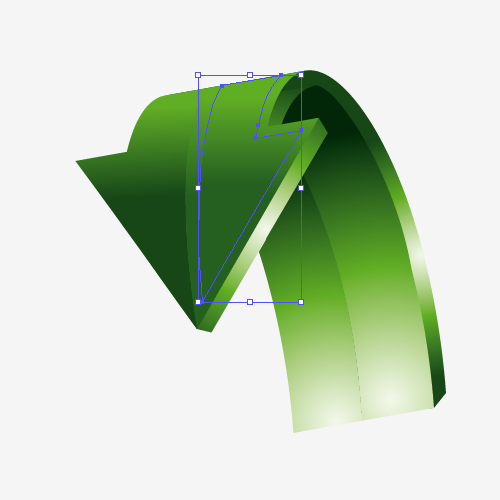 Apply a nice linear gradient to the new shape.
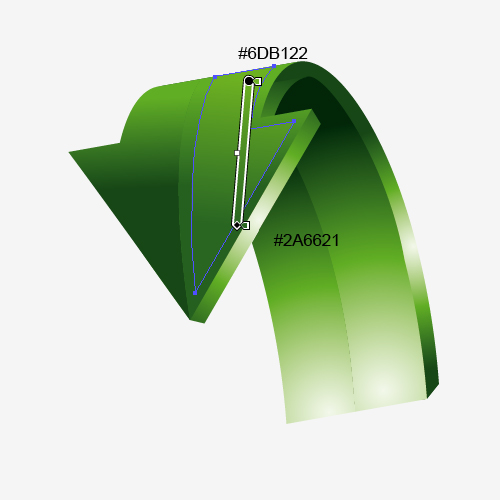 We can do the same thing with the left side of the arrow. You should end up with something like this.
 In order to create more light reflections we will divide some other parts of the arrow as well. Grab the Line Tool (
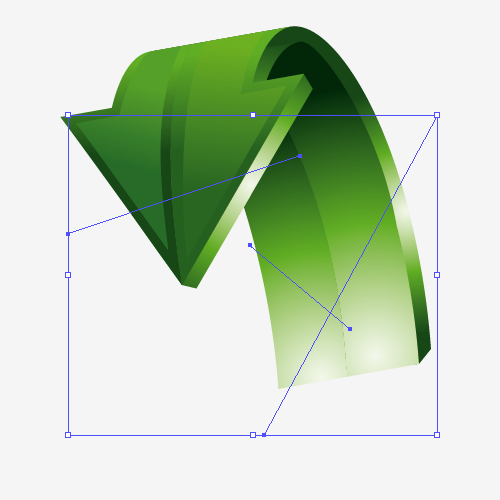 Use each of the lines to divide the surface underneath the line. Just select the line and the shape you want to divide and under the Pathfinder Panel hit the Divide button.
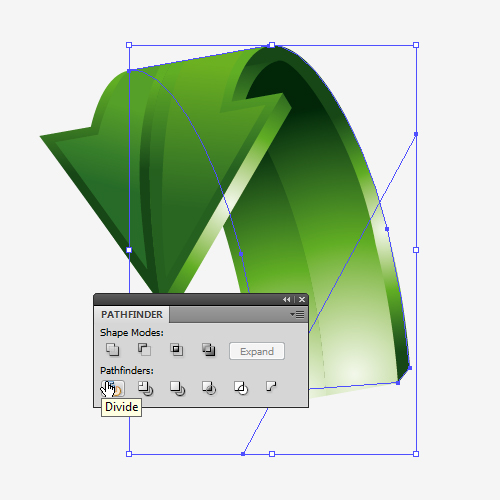 Apply a green radial gradient to the new shape, just make sure to create a sharp transition, just as it's shown in the pictures below.
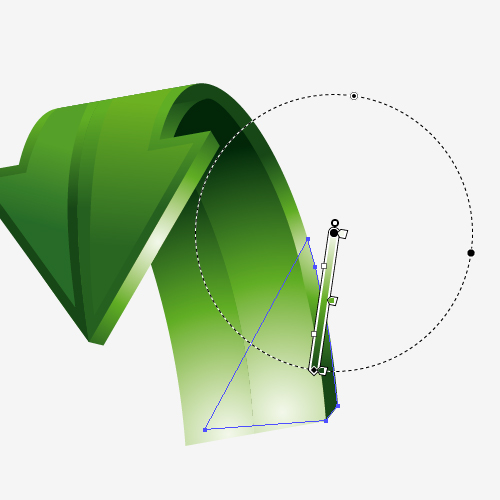 Repeat this step for the other shapes as well. It will create nice light reflections.
 Some nice edge highlights will give our illustration a real glossy look.
 The Final Touch
Now we will combine our globe with the arrows. To be able to set the two arrows in the right place we will have to learn to draw a Clipping Mask. A Clipping Mask is actually a random shape without the Fill and Stroke colors which allows us to hide some parts of the illustration.
Let's get down to business.
Place the arrow on the top of the globe (
 Grab the Pen Tool (
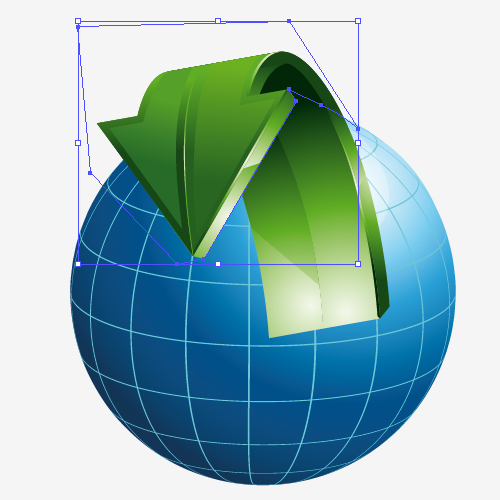 When you are drawing the shape for the Clipping Mask keep in mind what parts of the arrows needs to be visible (
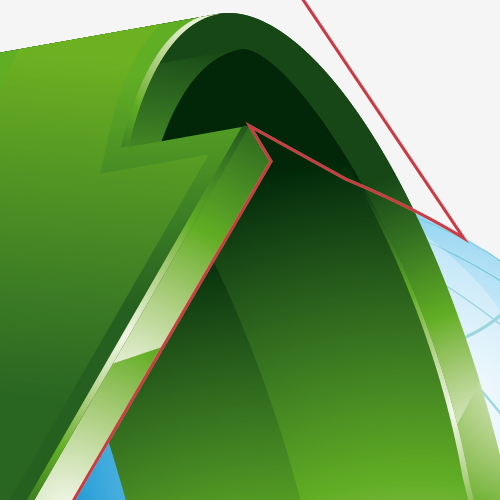 When you are satisfied with the shape of the Clipping Mask remove the Stroke color, select the globe and the arrow and under the right click select Make Clipping Mask.
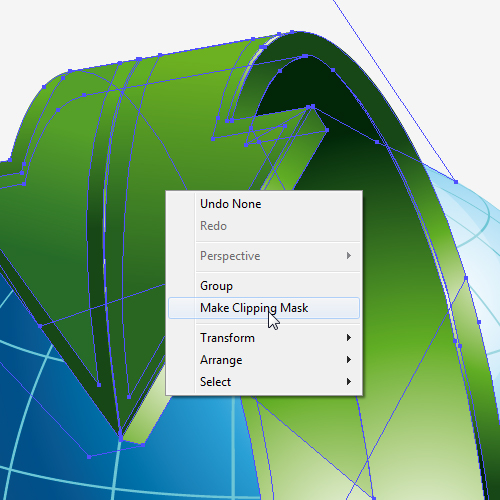 This action will hide all parts of the arrow outside the Clipping Mask. This way we have created the illusion that the arrow is "sitting" on the globe.
 Duplicate (
 Repeat the steps for creating the Clipping Mask and you should get something like this.
 Feel free to create a few more shadows and some sparks...
 ...and we are done!

 Just feel free to be creative and to explore the other possibilities. Hope you like this tutorial. Thank you for following along.
(rb)
 Creating the Globe
Before we create the globe we need to prepare a grid of parallels and meridians. It means we have to prepare the symbol that we'll apply to the globe. The Blend Tool will help us do that.
Grab the Line Tool (
Creating the Globe
Before we create the globe we need to prepare a grid of parallels and meridians. It means we have to prepare the symbol that we'll apply to the globe. The Blend Tool will help us do that.
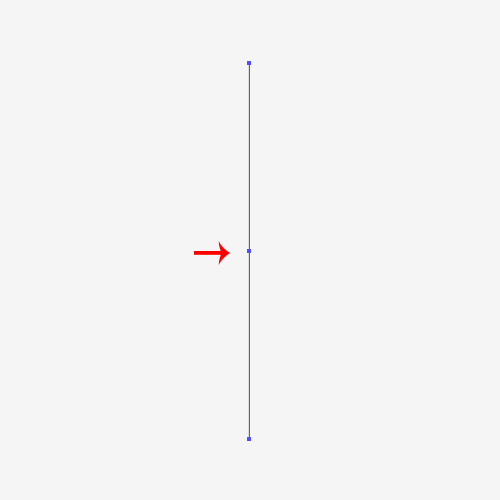
Grab the Line Tool (/) from the Tool Panel and create a vertical line. Now, select Add Anchor Point Tool (+) and add an anchor point exactly in the middle of the line.
 Select the Direct Selection Tool (
A) from the Tool Panel, grab that anchor point and drag it to the left (don't forget to hold the Shift key on the keyboard for straight dragging).
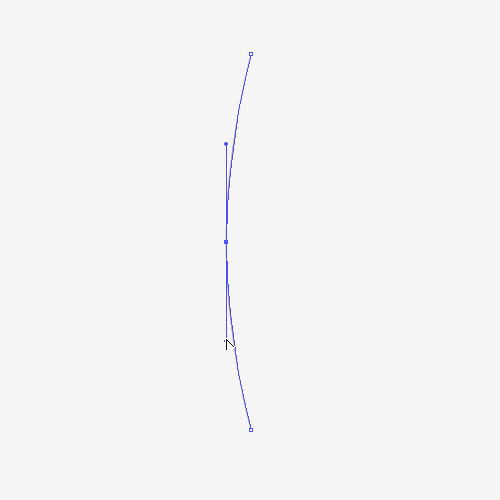
 This way we have created a sharp corner. We need to smooth it out. Grab the Convert Anchor Point Tool (
Shift + C) from the Tool Panel, click on the anchor point and to drag it downwards (Shift for straight dragging).
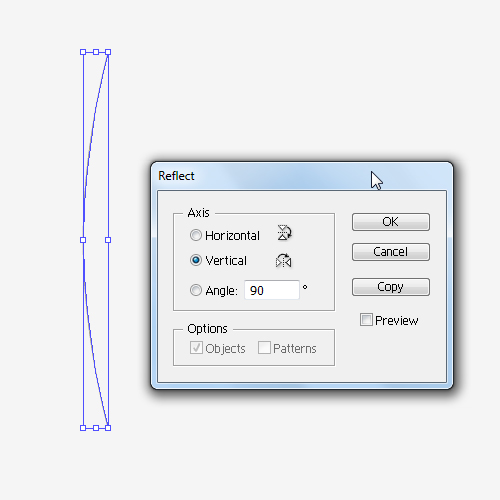
 Select the path and under Object select Transform > Reflect. Set the Axis to Vertical and hit the Copy button. It will create a mirror image of our path. Move the new path to the right (Shift for straight dragging).
 Select both paths and under Object select Blend > Make. It will create more paths in the middle. To specify the exact number of the paths open Blend Options (Object > Blend > Blend Options). We'll set the value for the Specified Steps to
 17.
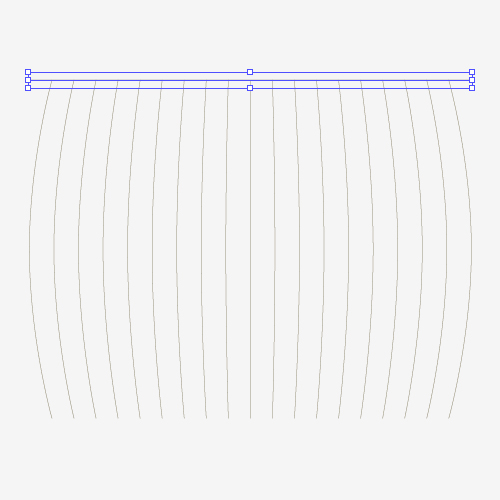
 Grab the Line Tool (
/) from the Tool Panel and create a horizontal line (Shift for straight dragging), as shown on the picture below.
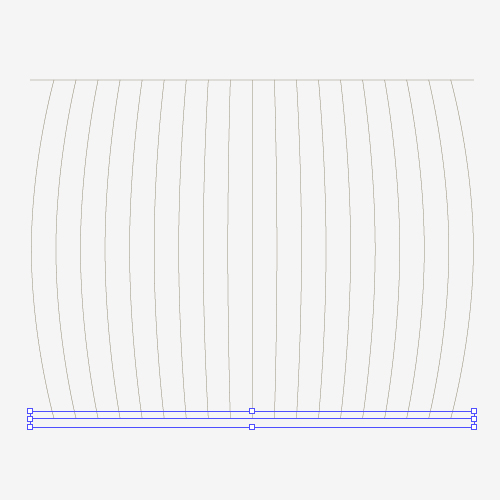
 Duplicate (
Ctrl / Cmd + C, Ctrl / Cmd + F) the line and place it as pictured.
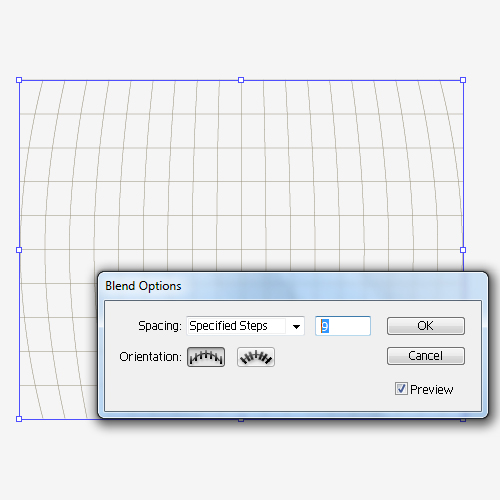
 Select both horizontal lines and under the Object select Blend > Make. Set the value for Specified Steps to
 9.
 Select all the elements we've created so far and Group them (
Ctrl / Cmd + G). Grab the group of elements and drag it to the Symbol Panel. Symbol Options window will pop up. Set the name to Grid, make sure to set the Type to Graphic and hit the OK button.
 Now we have created a symbol which we'll use to apply to our globe.
Creating the Globe
First of all, we have to create a circle. Grab the Ellipse Tool (
Now we have created a symbol which we'll use to apply to our globe.
Creating the Globe
First of all, we have to create a circle. Grab the Ellipse Tool (L) from the Tool Panel and create a circle (don't forget to hold the Shift key on the keyboard for the proper circle).
 With the Direct Selection Tool (
A) select the anchor on the left side and hit the Delete key on the keyboard to remove it. You should end up with something like this.
 Under Effect select 3D > Revolve.
 Under the 3D Revolve Options box make sure to set the Surface to Diffuse Shading and then hit the Map Art button. This is the where we are going to apply the symbol we created to our sphere.
 In the Symbol drop down Menu select the symbol of the grid we have already made. Make sure to hit Scale to Fit button. It will apply the grid symbol properly.

 You should end up with something like this.
 Now we need to apply some nice color gradients. To be able to do that, first we have to turn our object into editable shapes. Under Object select Expand Appearance. Then we need to Ungroup (
Shift + Ctrl/ Cmd + G) the object. Be ready to repeat that action a few times, until you "separate" the sphere from the grid. When you achieve that select the sphere (you'll notice that it contains many concentric circles) and under the Pathfinder Panel hit the Unite button. This will turn the circles into a single one.
 Set the Fill color for the grid to
 #61D4E0.
 We are going to apply a nice blue radial gradient to the circle. It will turn our circle into a nice blue sphere.
 There is one more thing we should add to the globe. Select the Rectangle Tool (
M) from the Tool Panel and create the ellipse. Set its Fill color to white (#FFFFFF) and place it as it shown on the picture below.
 Set the Opacity of the new ellipse to
 26%.
 Our globe is ready for some nice arrows. Before we create them don't forget to Group (
Ctrl / Cmd + G) all the elements of the globe together.
 Creating the Arrows
To create nice 3D arrows we will be using 3D effect Revolve. It will help us to fold the arrow around the globe. So, lets get started. First we will create the shape of the arrow.
Grab the Rectangle Tool (
Creating the Arrows
To create nice 3D arrows we will be using 3D effect Revolve. It will help us to fold the arrow around the globe. So, lets get started. First we will create the shape of the arrow.
Grab the Rectangle Tool (M) and create a rectangle, as it's shown on the picture below.
 Now, grab the Star Tool from the Tool Panel and click on the Artboard. The Star Options window will pop up. Set the value for Points to
 3 and hit the OK button.
 It will create a triangle. Rotate it and place it as it show on the picture below. Align the shapes by using Vertical Align Center under the Align Panel.
 When you are satisfied with the result under the Pathfinder Panel hit the Unite button. It will turn both shapes into the arrow shape.
 Drag the arrow to the Symbol Panel and name it Arrow. Set the Type to Graphic. This way we are creating the symbol of the arrow which we'll be using later.
 Now, grab the Rectangle Tool (
M) from the Tool Panel and create a rectangle, as pictured.
 Under the Effects select 3D > Revolve. Check the Preview box in order to be able to see what are we doing. Under the Revolve Options box click on the Map Art button.
 You will notice that the cylinder contains three sides. Upper ellipse, lower ellipse and the lateral side of the cylinder. Switch between sides, and when you select the lateral side of cylinder select the arrow in the drop down menu for Symbol. Also, make sure to check Invisible Geometry. It will remove the cylinder shape and only the arrow will be visible.
 Feel free to play with the size and the rotation of the arrow, until you reach the right angle and position.
 When you reach a desirable result hit the OK button. We can also change the rotation of the invisible cylinder in order to find the best position for our arrow by rotating the cube in the 3D Revolve Options box.
 Now we have to turn our arrow into an editable shape. Select the shape with the arrow and under Object hit Expand Appearance. You should end up with something like this.
 Lets Ungroup (
Shift + Ctrl / Cmd + G) the new shape (we'll have to do it more than once) and remove everything besides the arrow. This is what we should have by now (blue color is changed to be able to see the result clearly).
 Take a good look at the arrow. See if there are any unnecessary anchor points and remove them.
Now we have to turn the arrow into a 3D shape. Select both parts of the arrow and duplicate them (
Take a good look at the arrow. See if there are any unnecessary anchor points and remove them.
Now we have to turn the arrow into a 3D shape. Select both parts of the arrow and duplicate them (Ctrl / Cmd + C, Ctrl / Cmd + F). Using the arrow keys on the keyboard nudge the copies a few pixels to the right and then downwards. You should end up with something like this.
 We have to connect some shapes now. Grab the Add Anchor Point Tool (
+) from the Tool Panel and add few anchor points.
 With the Direct Selection Tool (
A) grab the new anchor point and move it to the lower corner of the green shape.
 Repeat this step for the other corners of the arrow as well.


 To be able to create a glossy arrow with lots of reflected parts, we'll have to divide some parts of the arrow. Select the Pen Tool (
P) from the Tool Panel and create the path as it's shown in the picture. We will use the path to divide the red part of the arrow. Just select them both (red shape and the green path) and under the Pathfinder Panel hit the Divide button. It will split the red shape exactly in half. Don't forget to Ungroup it (Shift + Ctrl / Cmd + G).

 And, now our arrow is ready to get some nice colors.
Applying the Color Gradients
In this part of the tutorial we will try to achieve a nice glossy look for the arrow.
To start we will apply some nice linear gradients.

 Use a radial gradient for lateral side.

 We can also divide the inner part of the arrow. Just create another path using the Pen Tool (P) and divide the inner side of the arrow. Apply a nice radial gradient to both sides.

 We can also make some additional shapes that will help us to create the glossy look of the arrow. Select the right upper side of the arrow and under Object select Path > Offset Path. Set the value for Offset to
 -3 and hit the OK button.
 With the Direct Selection Tool (
A) move the upper side of the new shape. Just select the upper anchor points and move them upwards, as shown below.
 Apply a nice linear gradient to the new shape.
 We can do the same thing with the left side of the arrow. You should end up with something like this.
 In order to create more light reflections we will divide some other parts of the arrow as well. Grab the Line Tool (
/) from the Tool Panel and create a few random lines.
 Use each of the lines to divide the surface underneath the line. Just select the line and the shape you want to divide and under the Pathfinder Panel hit the Divide button.
 Apply a green radial gradient to the new shape, just make sure to create a sharp transition, just as it's shown in the pictures below.
 Repeat this step for the other shapes as well. It will create nice light reflections.
 Some nice edge highlights will give our illustration a real glossy look.
 The Final Touch
Now we will combine our globe with the arrows. To be able to set the two arrows in the right place we will have to learn to draw a Clipping Mask. A Clipping Mask is actually a random shape without the Fill and Stroke colors which allows us to hide some parts of the illustration.
Let's get down to business.
Place the arrow on the top of the globe (
The Final Touch
Now we will combine our globe with the arrows. To be able to set the two arrows in the right place we will have to learn to draw a Clipping Mask. A Clipping Mask is actually a random shape without the Fill and Stroke colors which allows us to hide some parts of the illustration.
Let's get down to business.
Place the arrow on the top of the globe (as pictured). Duplicate (Ctrl / Cmd + C, Ctrl / Cmd + F) the arrow and send the copy behind the globe (Shift + Ctrl / Cmd + [). You should end up with something like this.
 Grab the Pen Tool (
P) from the Tool Panel and draw a shape similar to this.
 When you are drawing the shape for the Clipping Mask keep in mind what parts of the arrows needs to be visible (
everything inside the path will remain visible). Also make sure to follow the shape of the globe in order to avoid overlapping the globe and the part of the arrow that needs to be behind it.
 When you are satisfied with the shape of the Clipping Mask remove the Stroke color, select the globe and the arrow and under the right click select Make Clipping Mask.
 This action will hide all parts of the arrow outside the Clipping Mask. This way we have created the illusion that the arrow is "sitting" on the globe.
 Duplicate (
Ctrl / Cmd + C, Ctrl / Cmd + F) the green arrow behind the globe, Bring it to the Front (Shift + Ctrl / Cmd + ]) and change the color to red. Using the Reflection feature under Object > Transform > Reflect flip the arrow upside down by using reflection on a Horizontal and Vertical axis. You should end up with something like this.
 Repeat the steps for creating the Clipping Mask and you should get something like this.
 Feel free to create a few more shadows and some sparks...
 ...and we are done!
The Conclusion
Glad that you went through the entire tutorial. It will help you to create a really interesting web icon that can be used for different kinds of purposes (business, environment, communication, etc). Using this technique you can actually do other kinds of illustrations as well.

 Just feel free to be creative and to explore the other possibilities. Hope you like this tutorial. Thank you for following along.
(rb)
i really like it.And it really worth it to be a great logo.And most used in business.As a newbie i really thanks for my heart.Good luck.
nice. I like it
It is awesome :)
Tried 10 different times and can’t get this to work. I’ve noticed only good reviews, so this website just filters out the bad. I’ve been using Illustrator for 12 years and something is missing from this tutorial.
Dear John Q,
I would like to help you out with the problem you have. If you like, send me an email with description of your problem and I will do my best to find the right solution. You can find my email address on my portfolio page. Thank you.
Dear sir,
Omnipotent Allah bless you for your blog
I am voiceless what i am saying . b e a u t i f u l
Thank you very much!
Hi..
Im a learner..
im learning more tricks from dis site..
Thanks to all team members..
Could you please do a turorial in YOUTUBE, so we could learn and benefit from your creativity. Thanks in advance :)
Very Nice graphics