Adobe Illustrator Tutorial: Creating a Realistic Curtain
Adobe Illustrator has an amazing feature that allows us create many realistic illustrations. Today we will have the opportunity to practice with the Mesh Tool once again. We will use it to create an interesting damask curtain. The Mesh Tool will help us to create the illusion of the silk look of the curtain with a nice floral design. You can use this simple technique to create similar illustrations (a waving flag, for example).
So, let's get started on this new Adobe Illustrator tutorial.
The final result should look something like this.

 Duplicate it (
 With the Ellipse Tool (
 Select all the elements and under the Pathfinder Panel hit the Unite button. It will unite all the elements into one shape.
 Create another circle and place it as shown in the picture below.
 Duplicate (Ctrl / Cmd + C, Ctrl / Cmd + F) the red circle and move it to the right. Make sure to align the elements properly. Under the Pathfinder Panel hit the Minus Front button.
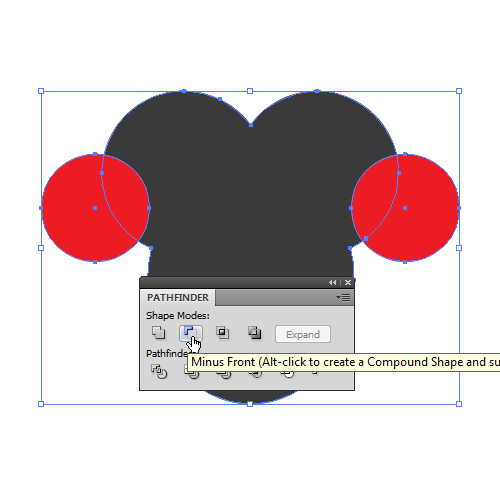
 Grab the Ellipse Tool (
 Drag and drop the shape we have just created to the Brush Panel. The New Brush window will pop up. Make sure to check the Art Brush box.
 In the Art Brush Options window make sure to set the Colorization Method to Tint. It will allow you to change the color of the brush directly, without expanding the objects.
 This way we have created the brush that we will use a little bit later.
Now, grab the Pen Tool (
 Set the Stroke to
  Now we are going to turn the path into an editable shape. This is going to allow us to adjust the positions of some anchor points. Under Object select Expand. Grab the Direct Selection Tool (
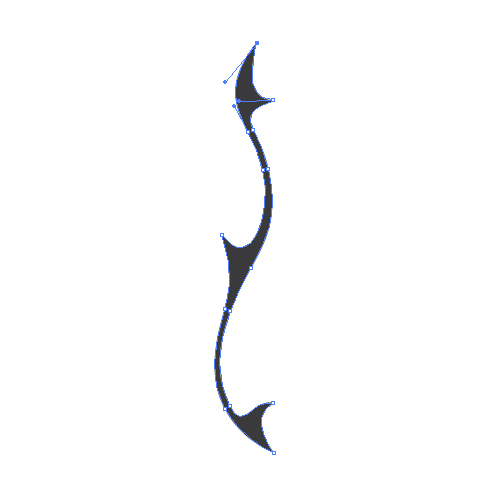 This is also one of the shapes we will use a little bit later.
Now, let's create a small leaf. To do that we will be using the Ellipse Tool (
 Grab the Pen Tool (
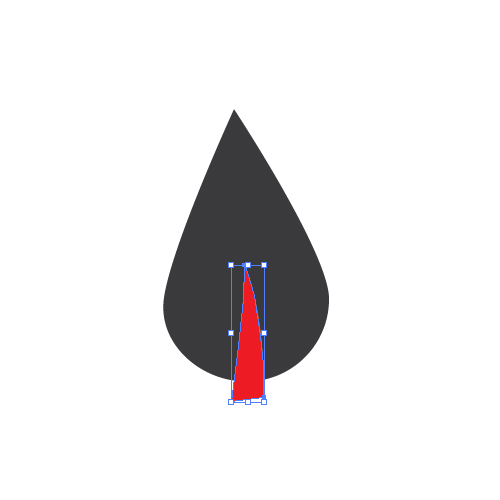 Select both shapes and under the Pathfinder Panel hit the Minus Front button.

 For the next floral element we will use the Pen Tool (
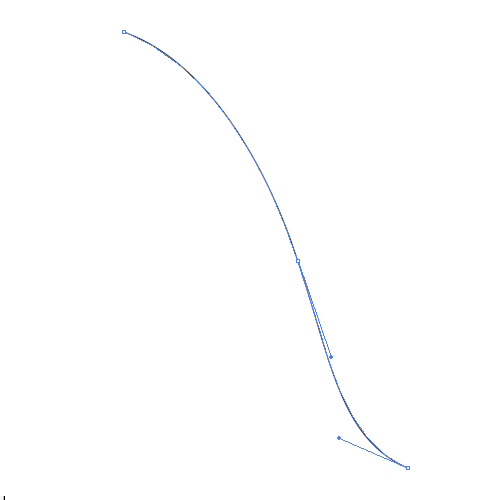 Set the Stroke to 5 pt and expand the path under Object > Expand.
With the Direct Selection Tool (

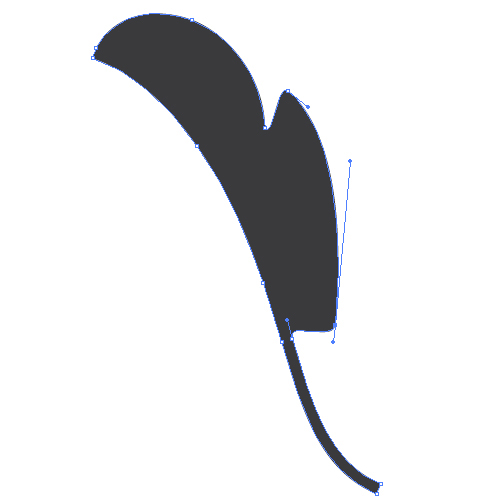
 There are numerous shapes we can create this way. Just use your imagination and make sure to create smooth shapes.
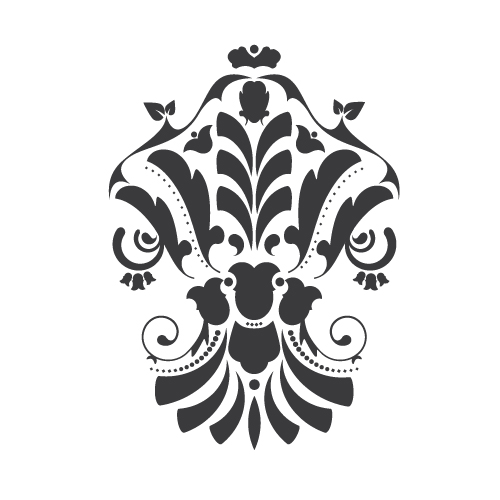
Let's put our elements together and try to create a nice looking floral pattern.
Grab the Arc Tool from the Tool Panel and create the arc as shown in the picture below.
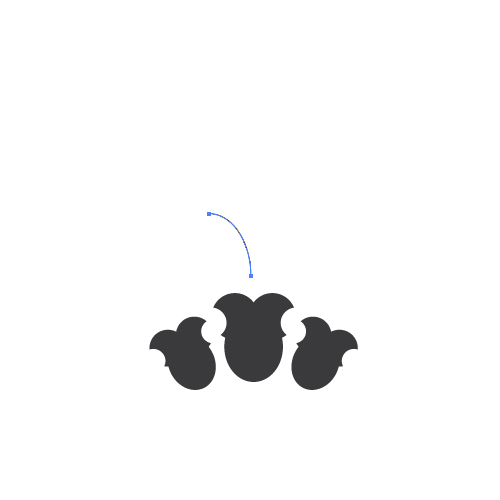 Reflect the arc by using the reflecting feature under Object > Transform > Reflect. Set the Axis to Vertical and hit the
  Make two more copies (Ctrl / Cmd + C, Ctrl / Cmd + F) of the arc and place them like they are below.
 With all arcs selected, choose the brush from the Brush Panel that we made earlier. You should end up with something like this.
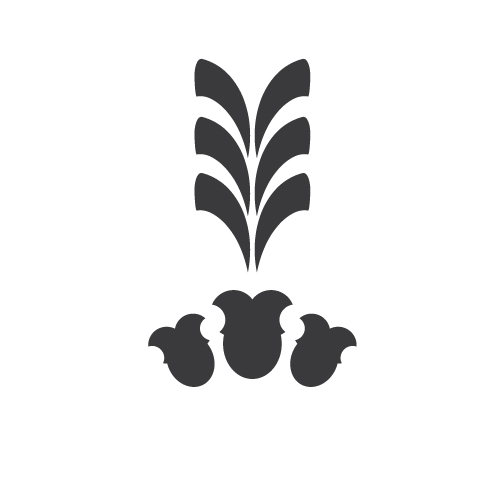 Continue arranging the shapes we have already made.


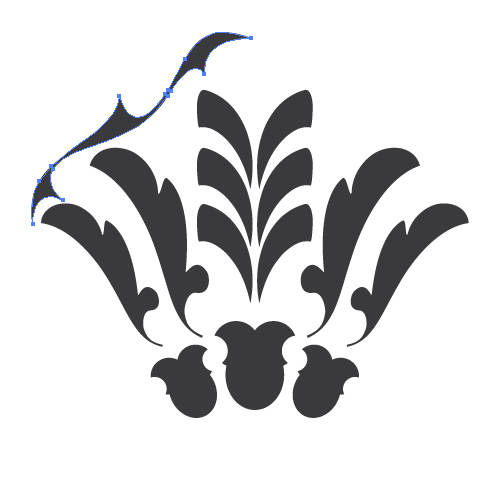 Each time we add a new shape to our illustration we will use Reflection to create a mirror image in order to create a symmetrical illustration. In the same time make sure to align all of the elements to be centered.
 Grab the Ellipse Tool (
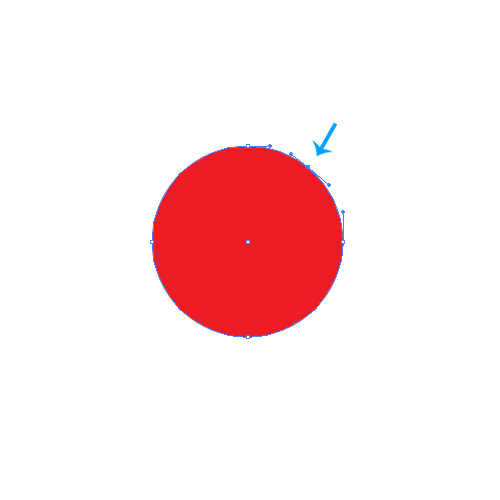 With the Direct Selection Tool (
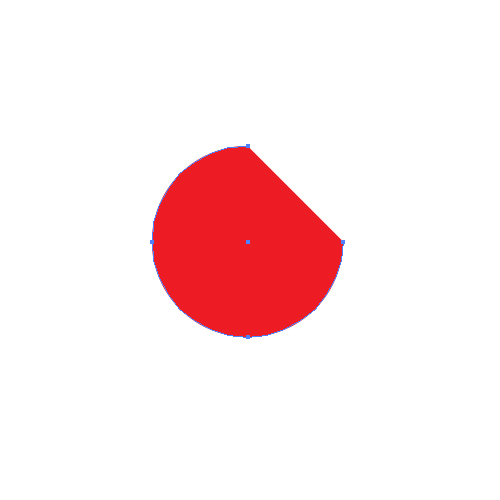 Remove the Fill color and apply the brush we have made earlier.
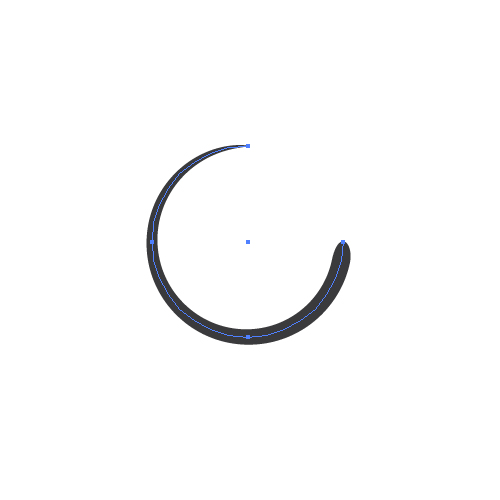 Place the new shape as it shown on the picture below.
 You can also add three flowers to make this part more interesting.
 Duplicate (
 Grab the Ellipse Tool (
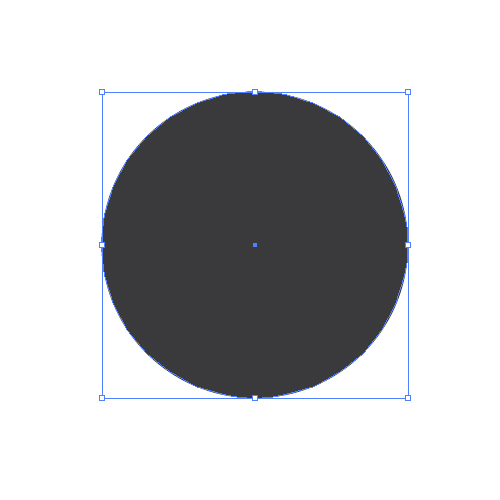 With the Pen Tool (
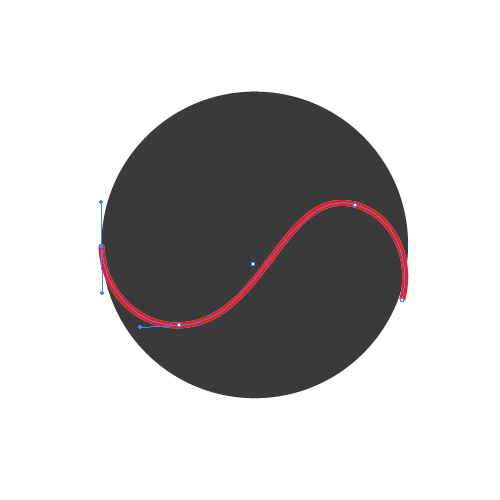 Select the circle and the red path and under the Pathfinder Panel hit the Divide button. Ungroup the (
 Select the new elements on the right side of the floral design and under Object select Transform > Reflect. Set the Axis to Vertical and hit the
  Using techniques from previous steps create new elements.
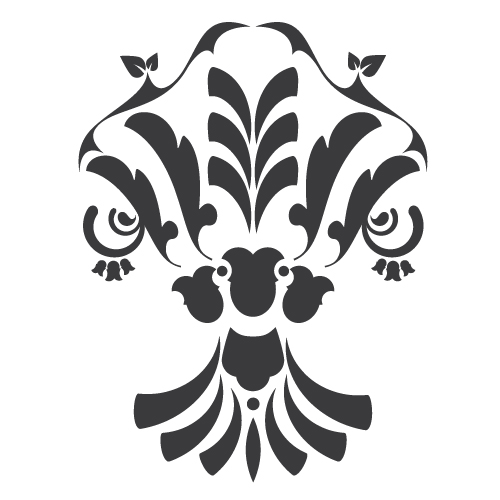 Let's create one more interesting detail for our floral design. Grab the Ellipse Tool (L) from the Tool Panel and create a small circle. Duplicate it (
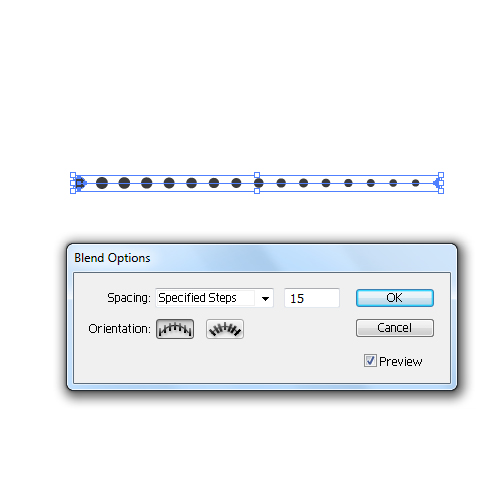
 Select both circles and under Object select Blend > Make. To set the number of the circles that are going to appear between these two circles under the Blend Tool set the Spacing to Specified Steps and the value to
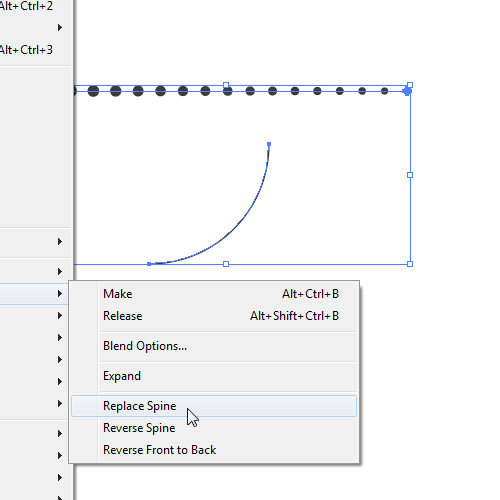
  Now we are going to use the Arc Tool again. Create the arc, select it within our line of descending circles and under the Object select Blend > Replace Spine. It will arrange the circles to follow the path of the arc.
 Using the same technique, create a few more interesting details and complete our floral design.
 Duplicate (C
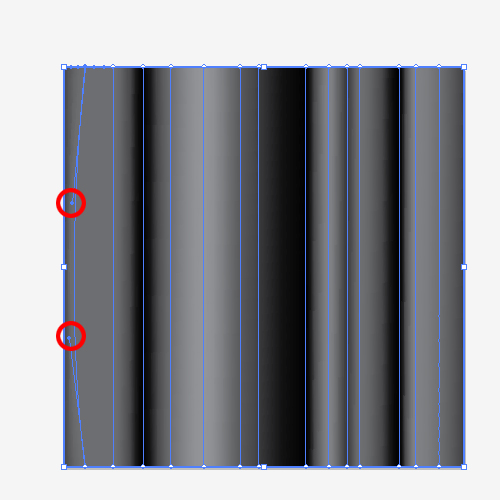
 Now grab the Mesh Tool (
 Keep applying new anchor points randomly.
 Now we are going to apply different tones of gray color to the anchor points. Select the Direct Selection Tool (
 With the Direct Selection Tool (
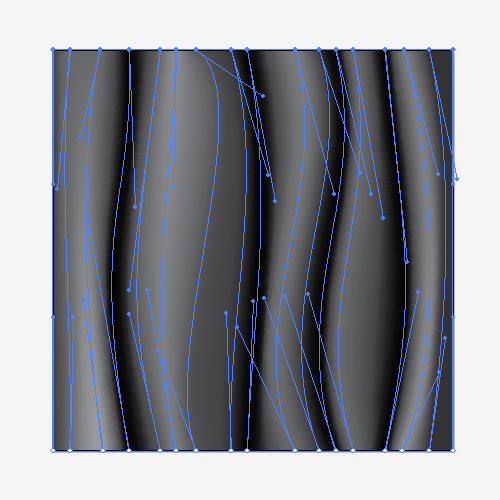 When you are satisfied with the result unlock the layer we locked earlier and set the Fill color of the rectangle to
  At this moment we will add the floral pattern we created earlier.
Duplicate (
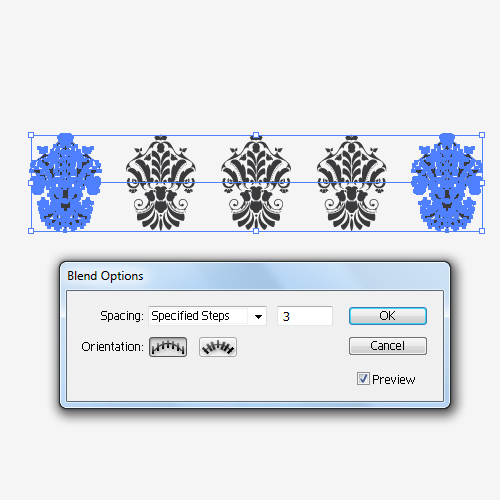
 Don’t forget to align the shape by using Vertical Align Center. Select both shapes and under Object select Blend > Make. It will create a few more floral elements in the middle. To set the exact number of the floral elements we need to bring up the Blending Options box. To do that go to Object > Blend > Blend Options. Set the Spacing to Specified Steps and the value to
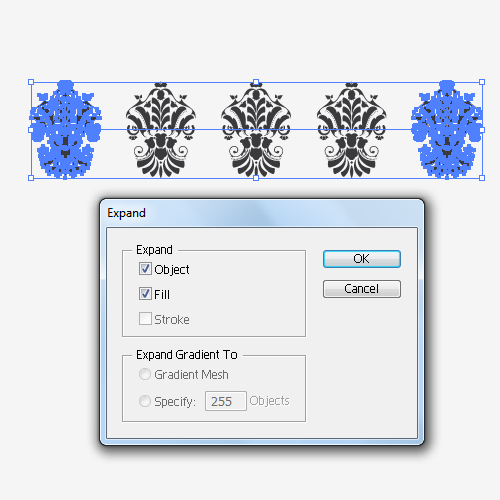
  Turn the result into an editable shape by selecting Object > Expand.
 Duplicate (
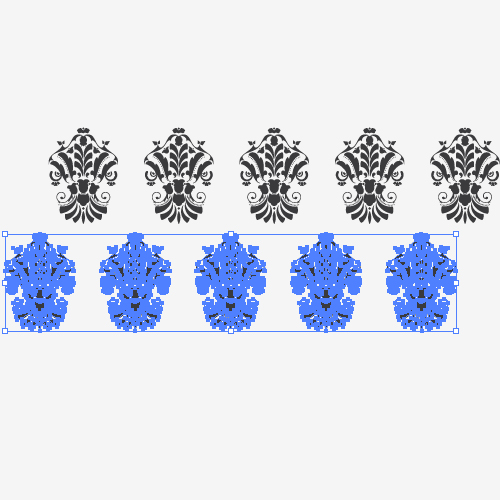 Repeat the previous step. To make sure to create equal distance between the rows select all the elements and under the Align Panel hit the Vertical Distribute Space.
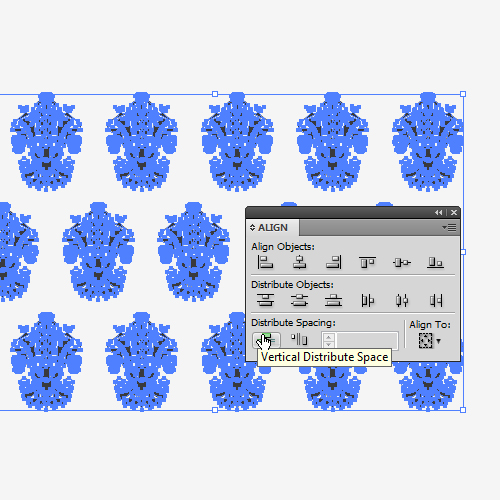 Group (
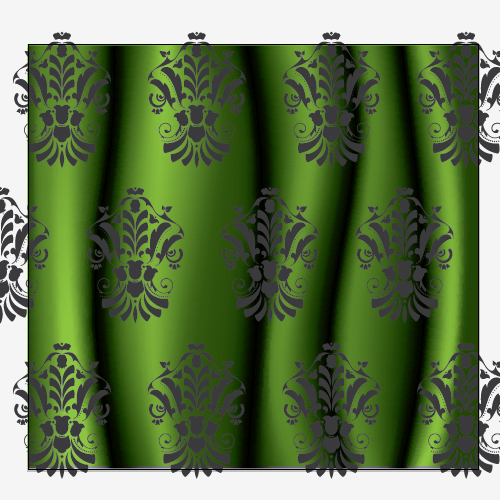 Make sure to set the Fill color of the floral elements to
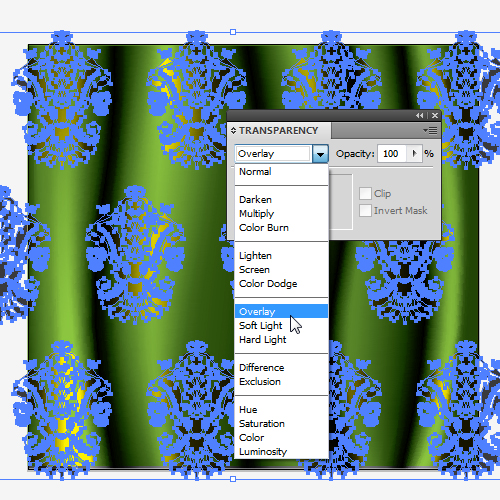
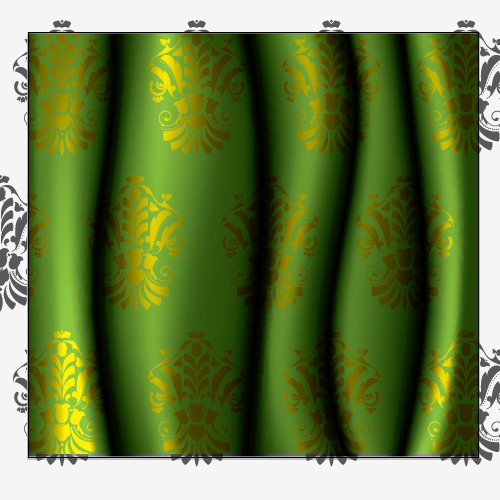 Select all the elements we have created so far and Group them (
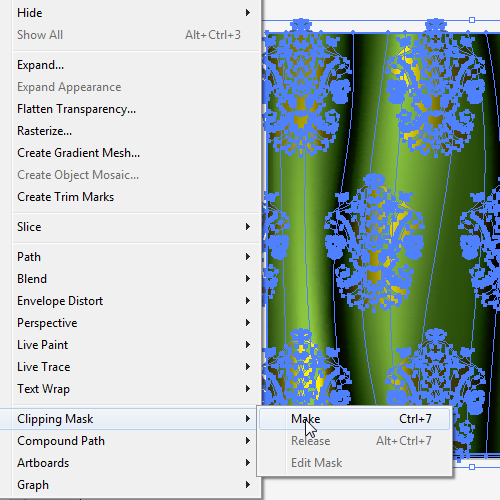
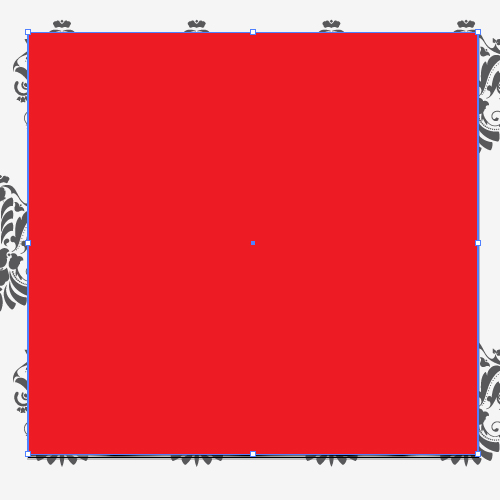 Remove the Fill color and the Stroke color of the rectangle. Select all the elements and under Object select Clipping Mask > Make. It will hide all the elements outside the new rectangle.
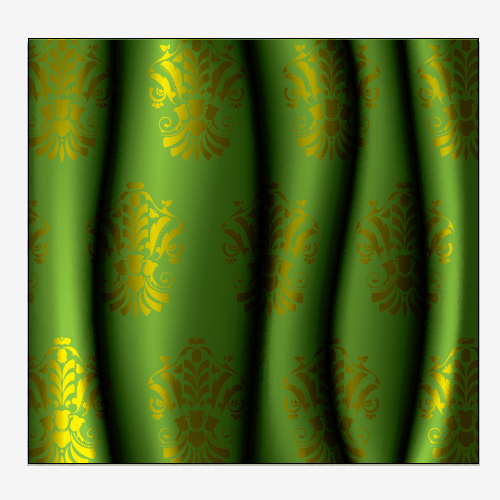
 This is actually the final result of our vector illustration.
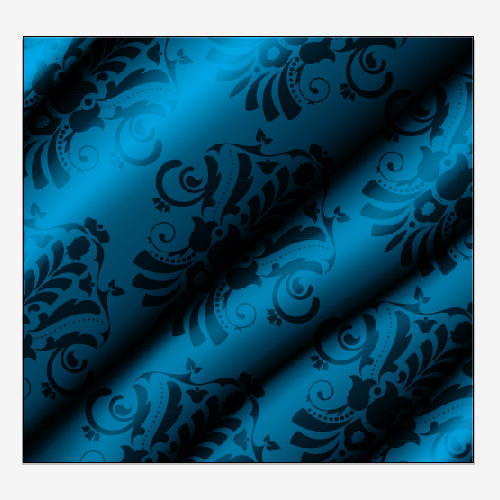
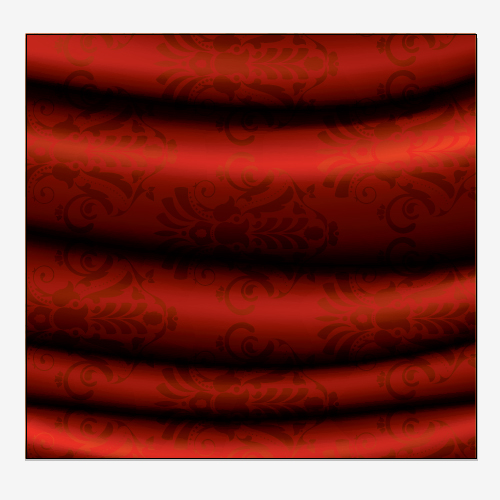
 Feel free to use different colors, shapes and angles. The results can be very interesting.

Creating the Floral Pattern
There are numerous patterns you can create to apply to the curtain. We will make a nice and interesting floral design. Creating the floral design is actually very simple. The only thing you have to pay attention to is creating smooth paths and symmetrical shapes. We will be using the Pen Tool (P), Ellipse Tool (L), Blend Tool and some other very useful Adobe Illustrator features. First we will prepare a few brushes that we'll apply to some simple shapes.
Grab the Ellipse Tool (L) from the Tool Panel and create a circle.
 Duplicate it (
Ctrl / Cmd + C, Ctrl / Cmd + F) and place it as it's shown on the picture below (hold the Shift key on the keyboard for straight dragging).
 With the Ellipse Tool (
L) create an ellipse and place it in the middle.
 Select all the elements and under the Pathfinder Panel hit the Unite button. It will unite all the elements into one shape.
 Create another circle and place it as shown in the picture below.
 Duplicate (Ctrl / Cmd + C, Ctrl / Cmd + F) the red circle and move it to the right. Make sure to align the elements properly. Under the Pathfinder Panel hit the Minus Front button.

 Grab the Ellipse Tool (
L) again from the Tool Panel and create a small circle. With the Direct Selection Tool (A) grab the lower anchor point and drag it downwards (hold the Shift key on the keyboard to ensure straight dragging).
 Drag and drop the shape we have just created to the Brush Panel. The New Brush window will pop up. Make sure to check the Art Brush box.
 In the Art Brush Options window make sure to set the Colorization Method to Tint. It will allow you to change the color of the brush directly, without expanding the objects.
 This way we have created the brush that we will use a little bit later.
Now, grab the Pen Tool (
This way we have created the brush that we will use a little bit later.
Now, grab the Pen Tool (P) from the Tool Panel and create the path as pictured.
 Set the Stroke to
 5pt.
 Now we are going to turn the path into an editable shape. This is going to allow us to adjust the positions of some anchor points. Under Object select Expand. Grab the Direct Selection Tool (
A) from the Tool Panel and try to adjust the shape as it's shown.
 This is also one of the shapes we will use a little bit later.
Now, let's create a small leaf. To do that we will be using the Ellipse Tool (
This is also one of the shapes we will use a little bit later.
Now, let's create a small leaf. To do that we will be using the Ellipse Tool (L). Create a circle (hold the Shift key on the keyboard for the proper circle). With the Direct Selection Tool (A) select the upper anchor point and drag it upwards (Shift for straight dragging). With the Convert Anchor Point Tool (Shift + C) turn the top of the shape into the sharp corner.
 Grab the Pen Tool (
P) from the Tool Panel and create the shape shown below.
 Select both shapes and under the Pathfinder Panel hit the Minus Front button.

 For the next floral element we will use the Pen Tool (
P). Draw the path as it is shown on the picture below.
 Set the Stroke to 5 pt and expand the path under Object > Expand.
With the Direct Selection Tool (
Set the Stroke to 5 pt and expand the path under Object > Expand.
With the Direct Selection Tool (A) adjust the positions of the anchor points and the angle of their handles. Try to create something like this.


 There are numerous shapes we can create this way. Just use your imagination and make sure to create smooth shapes.
Let's put our elements together and try to create a nice looking floral pattern.
Grab the Arc Tool from the Tool Panel and create the arc as shown in the picture below.
 Reflect the arc by using the reflecting feature under Object > Transform > Reflect. Set the Axis to Vertical and hit the
 OK button.
 Make two more copies (Ctrl / Cmd + C, Ctrl / Cmd + F) of the arc and place them like they are below.
 With all arcs selected, choose the brush from the Brush Panel that we made earlier. You should end up with something like this.
 Continue arranging the shapes we have already made.


 Each time we add a new shape to our illustration we will use Reflection to create a mirror image in order to create a symmetrical illustration. In the same time make sure to align all of the elements to be centered.
 Grab the Ellipse Tool (
L) from the Tool Panel and create a circle . With the Add Anchor Point Tool (+) add one anchor point like we've done below.
 With the Direct Selection Tool (
A) select the new anchor point and remove it by hitting the Delete key on the keyboard.
 Remove the Fill color and apply the brush we have made earlier.
 Place the new shape as it shown on the picture below.
 You can also add three flowers to make this part more interesting.
 Duplicate (
Ctrl / Cmd + C, Ctrl / Cmd + F) the curved path with the brush and scale it down little bit.
 Grab the Ellipse Tool (
L) one more time and create a circle.
 With the Pen Tool (
P) create a path as you can see done on the picture below.
 Select the circle and the red path and under the Pathfinder Panel hit the Divide button. Ungroup the (
Shift + Ctrl / Cmd + G) divided circle and remove one part by hitting the Delete key on the keyboard. Place the new shape as it shown on the picture below.
 Select the new elements on the right side of the floral design and under Object select Transform > Reflect. Set the Axis to Vertical and hit the
 OK button. Place the copies on the left side.
 Using techniques from previous steps create new elements.
 Let's create one more interesting detail for our floral design. Grab the Ellipse Tool (L) from the Tool Panel and create a small circle. Duplicate it (
Ctrl / Cmd + C, Ctrl / Cmd + F), scale it down and move it to the right.
 Select both circles and under Object select Blend > Make. To set the number of the circles that are going to appear between these two circles under the Blend Tool set the Spacing to Specified Steps and the value to
 15. It will create 15 circles in the middle.
 Now we are going to use the Arc Tool again. Create the arc, select it within our line of descending circles and under the Object select Blend > Replace Spine. It will arrange the circles to follow the path of the arc.

 Using the same technique, create a few more interesting details and complete our floral design.

Creating the Curtain
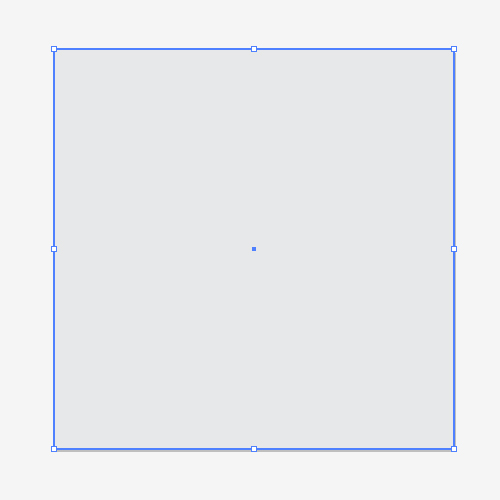
Now when we have our floral design ready and set, we can move on and create the illustration of a fancy curtain. First of all we are going to grab the Rectangle Tool (M) from the Tool Panel and to create an arbitrary rectangle.
 Duplicate (C
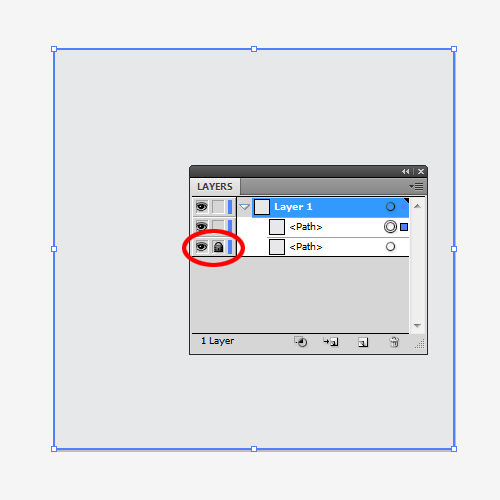
trl / Cmd + C, Ctrl / Cmd + F) the rectangle and lock the layer with the original rectangle. We are locking it to make sure not to distort it during our creation process.
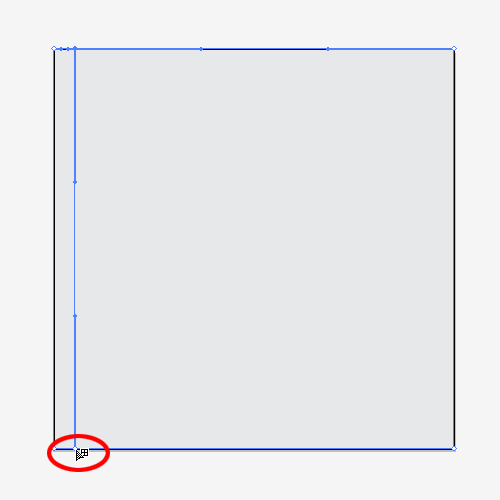
 Now grab the Mesh Tool (
U) and make sure to add new anchor points to the rectangle by clicking exactly on the edge of the rectangle.
 Keep applying new anchor points randomly.
 Now we are going to apply different tones of gray color to the anchor points. Select the Direct Selection Tool (
A) from the Tool Panel and by selecting each individual anchor point apply the gray color. Just make sure to apply the same tone of the gray color to the opposite anchor points.
 With the Direct Selection Tool (
A) try to adjust the angle of the handles of each anchor point. Just feel free to play around until you create smooth folded parts of the curtain.

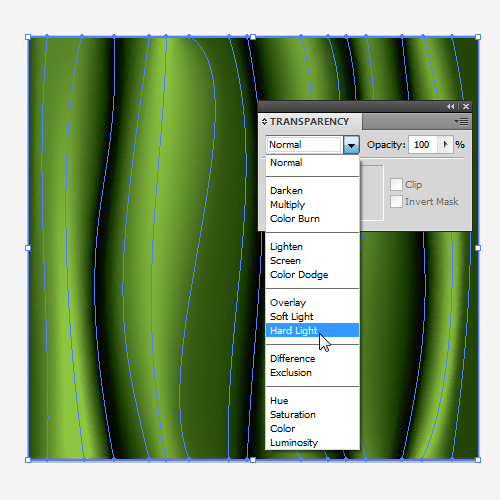
 When you are satisfied with the result unlock the layer we locked earlier and set the Fill color of the rectangle to
 #8DC63F. Now we are going to change the Blend Mode of the layer with the Mesh to Hard Light. This will change the color of the curtain to a nice green. Feel free to try out other Blending Modes until you achieve a nice result.
 At this moment we will add the floral pattern we created earlier.
Duplicate (
At this moment we will add the floral pattern we created earlier.
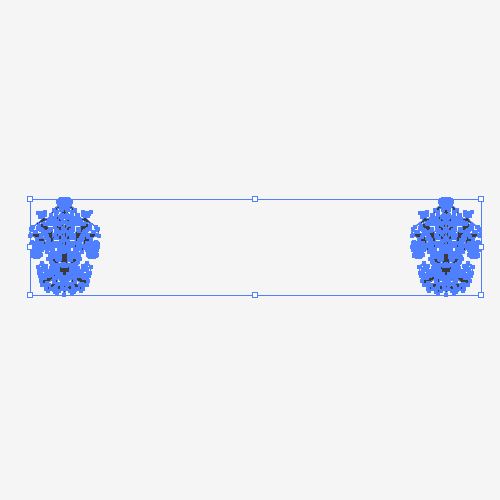
Duplicate (Ctrl / Cmd + C, Ctrl / Cmd + F) the floral shape we made earlier and place it as shown on the picture below.
 Don’t forget to align the shape by using Vertical Align Center. Select both shapes and under Object select Blend > Make. It will create a few more floral elements in the middle. To set the exact number of the floral elements we need to bring up the Blending Options box. To do that go to Object > Blend > Blend Options. Set the Spacing to Specified Steps and the value to
 3.
 Turn the result into an editable shape by selecting Object > Expand.
 Duplicate (
Ctrl / Cmd + C, Ctrl / Cmd + F) the row of floral elements and place them as they are below.
 Repeat the previous step. To make sure to create equal distance between the rows select all the elements and under the Align Panel hit the Vertical Distribute Space.
 Group (
Ctrl / Cmd + G) all the elements and place them on the top of the curtain we already created.
 Make sure to set the Fill color of the floral elements to
 #58595B and under the Transparency Panel set the Blending Mode to Overlay. Feel free to try out a combination of Fill colors (make sure to use a gray color, just change the tone) and different type of Blending Modes. You should end up with something similar to this.

 Select all the elements we have created so far and Group them (
Ctrl / Cmd + G). Grab the Rectangle Tool (M) from the Tool Panel and create the rectangle.
 Remove the Fill color and the Stroke color of the rectangle. Select all the elements and under Object select Clipping Mask > Make. It will hide all the elements outside the new rectangle.
 This is actually the final result of our vector illustration.
 Feel free to use different colors, shapes and angles. The results can be very interesting.


oh wow. really nice tutorial. opened up some insights on how to improve illustrator skills.
Wow ! It was a breathtaking time when i am seeing this tutorial . Good strategy you have used to make this .
Special Thanks . you know i am also a Designer and hope it will be informative for every designer .
Thanks again .
Jos jednom izvrstan posao,hvala neizmerno na sjajnim tutorijalima…salute!!:))
very nice and easy, intresting too thanking for good tips
Brilliant and awesome work and tutorial. Would like to know if we could transform / lay the motifs according to the surface of the green fabric drape, we create using the mesh tool. I mean, wherever the fabric gets folded, the motifs should also be… Looking forward
yh i believe you can do that using the mesh tool..might take a while though and a good sense of how the lines should flow with regards to the fabric
I speak less. Very nice design .Thanks for this design.
Thank you for your tutorial. Great job.
Thank you very much! I’ve learned a LOT today while doing this tutorial!