Hands-On: Build a Node.js-powered Chatroom Web App (Part Two)
This Node.js tutorial series will help you build a Node.js powered real-time chatroom web app fully deployed in the cloud. Throughout the series, you will learn how to setup Node.js on your Windows machine, how to develop a web frontend with Express, how to deploy a Node Express-based app to Microsoft Azure, how to use Socket.IO to add a real-time layer, and how to deploy it all together.
Level: Beginner to Intermediate--you are expected to know HTML5 and JavaScript
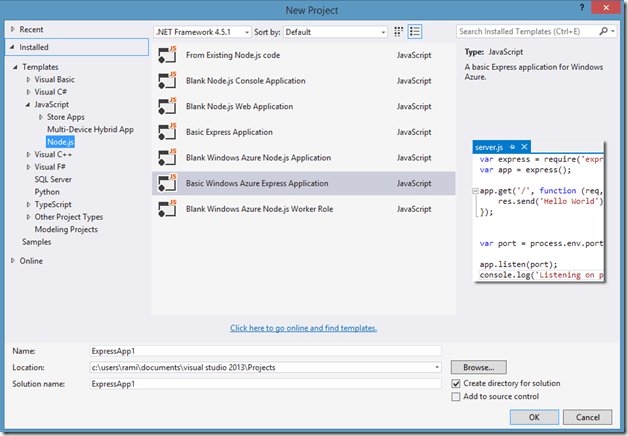
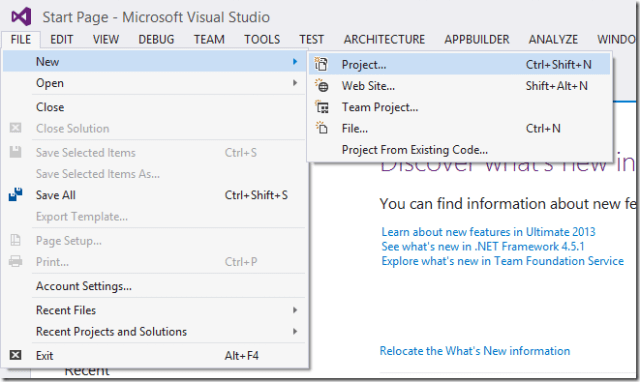 2. You will want to go to Installed > Templates > JavaScript menu item on the left and select Basic Windows Azure Express Application on the right. Choose a location and name for your project and click OK.
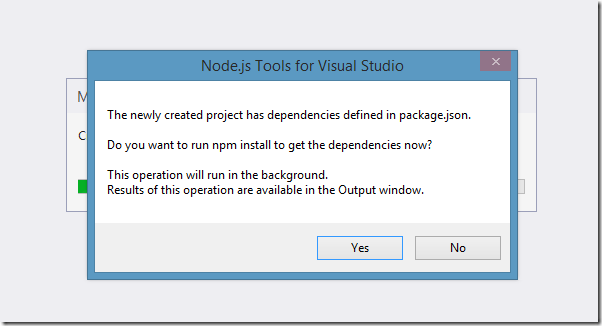
 3. A message will notify you that dependencies defined in package.json need to be installed using NPM the package manager. Take a look at an explanation of NPM here.
 4. A project will be generated that includes a file called app.js. We will start there.
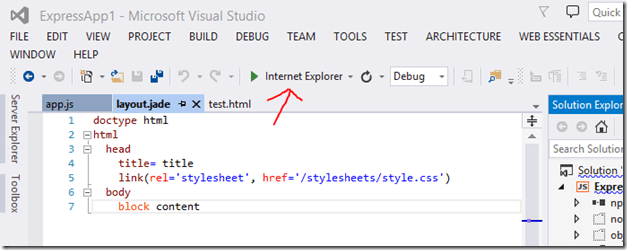 When pressed, this will start a Node.js server and open Internet Explorer to the root URL.
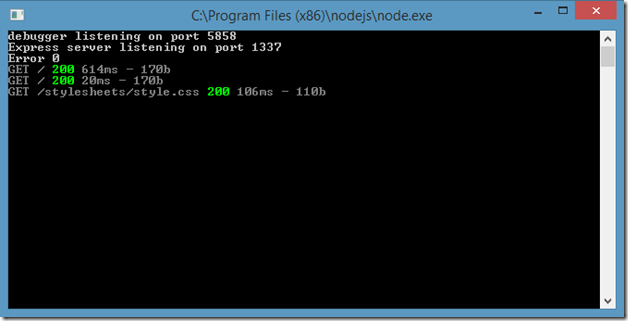
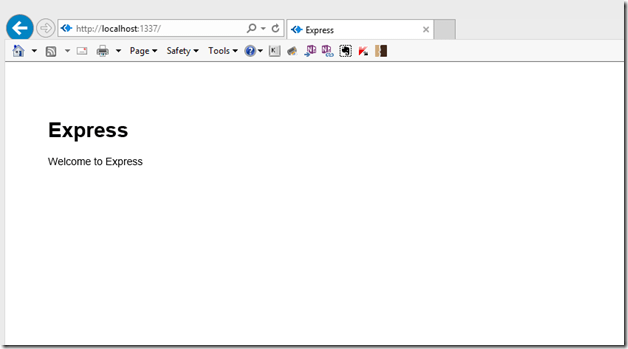
 2. The Publish menu item will open a wizard with a few options, you will want to select the target Microsoft Azure Websites.
3. You will be asked to sign in at this step. Please use the same Microsoft Account here as you did on the Azure sign up.
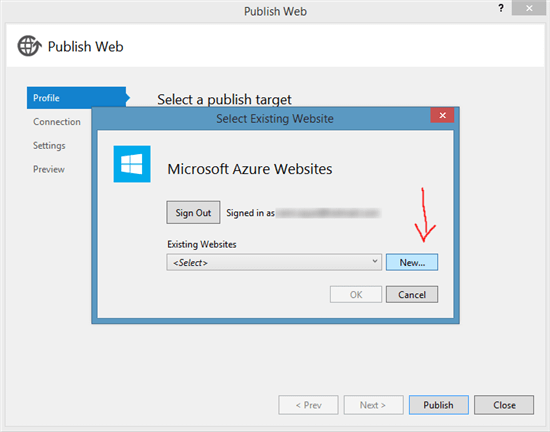
4. You will want to click New to create a new Azure website. If you already have one created, you can simply select it from the dropdown.
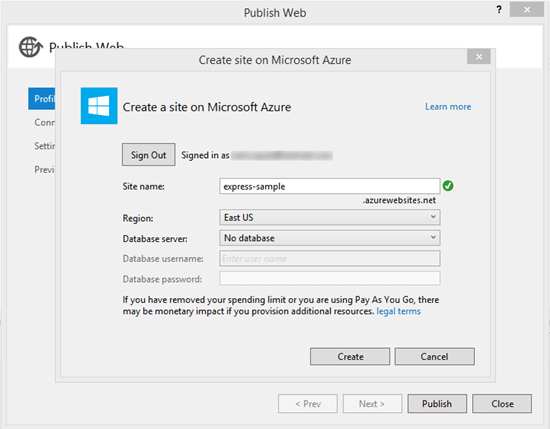
 5. Complete the fields in the wizard (just like below). Make sure to choose a unique site name and click Create.
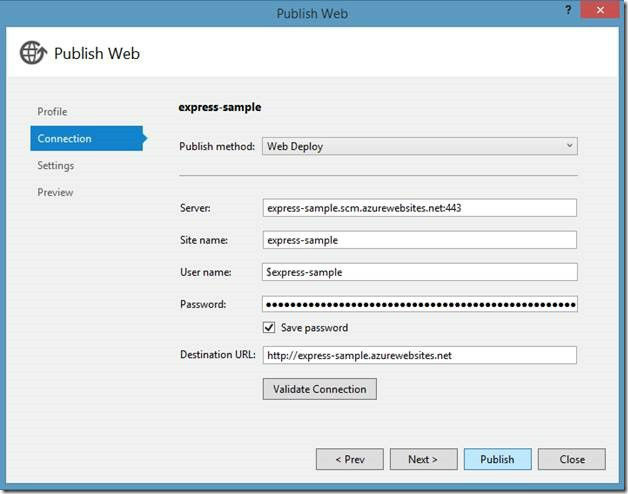
 6. You will be faced with a pre-filled wizard with a Publish bottom at the button, press Publish.
 YOU ARE DONE! YOU ARE NOW PUBLISHED TO THE AZURE CLOUD!
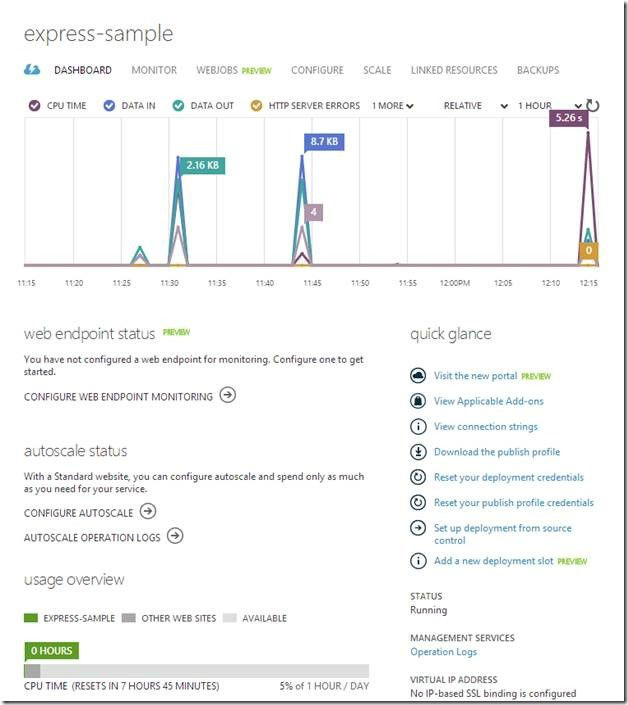
Take a tour of the Azure Websites in the Azure portal. You can watch a video here.
Note: if you encounter errors publishing, be sure to place your project closer to the root of the drive to avoid temporary copying errors.
Part 2: Welcome to Express with Node.js and Azure
Welcome to Part 2 of the hands-on Node.js tutorial series: Build a Node.js-powered chatroom web app. In this installment, I will show you how to start a new Express-based node project and deploy it to Azure.What is Express?
Express is a minimal, open source and flexible Node.js web app framework designed to make developing websites, web apps and APIs much easier.Why use Express?
Express helps you respond to HTTP requests with route support so that you may write responses to specific URLs. Express supports multiple templating engines to simplify generating HTTP responses. You will want to make sure Node.js is properly installed and ready. See part 1 of this tutorial series: Introduction to Node.js.Let’s Get Started
Starting a new Node.js project is fairly straightforward. 1. Start Visual Studio. On the File menu, click New, and then click Project. 2. You will want to go to Installed > Templates > JavaScript menu item on the left and select Basic Windows Azure Express Application on the right. Choose a location and name for your project and click OK.
 3. A message will notify you that dependencies defined in package.json need to be installed using NPM the package manager. Take a look at an explanation of NPM here.
 4. A project will be generated that includes a file called app.js. We will start there.
Explanation of app.js
//
/**
 * Module dependencies.
 */

var express = require('express');
var routes = require('./routes');
var user = require('./routes/user');
var http = require('http');
var path = require('path');

var app = express();

// all environments
app.set('port', process.env.PORT || 3000);
app.set('views', path.join(__dirname, 'views'));
app.set('view engine', 'jade');
app.use(express.favicon());
app.use(express.logger('dev'));
app.use(express.json());
app.use(express.urlencoded());
app.use(express.methodOverride());
app.use(app.router);
app.use(require('stylus').middleware(path.join(__dirname, 'public')));
app.use(express.static(path.join(__dirname, 'public')));

// development only
if ('development' == app.get('env')) {
  app.use(express.errorHandler());
}

app.get('/', routes.index);
app.get('/users', user.list);

http.createServer(app).listen(app.get('port'), function(){
  console.log('Express server listening on port ' + app.get('port'));
});
Lines 6 through 10
Lines 6 through 10 load various modules including express, http and path. What’s interesting is that we also load a module called routes (which will be explained later) and a module in the routes folder called user.Line 12
On this line, we called the function express() which will create our app this app will be used when we decide to create a HTTP Server and it will be the object containing all the properties of our web application as well as the mapping between the URL received in a request and the function handling its response.Line 15 through 17
On these lines, we set various configuration parameters such as what port the server will run on (line 15) and in which directory the template html files will be found (line 16). On line 17, we specify the templating engine that we want to use, in this case Jade. Jade is a popular templating engine that makes writing HTML extremely easy and without the extraneous syntax requirements of angle brackets (<>). You can change the templating engine to simply return HTML as is and not do anything further by replacing Line 17 with the following code: app.set('view engine', 'html');Line 18 through 23
On these lines, we set various configuration parameters. You can find the meaning of each individual parameter by taking a look at the API documentation. The explanation of these configuration parameters is not required for this tutorial.Line 24 and 25
These lines are interesting as it is where we specify middleware to handle Stylus CSS sheets and HTML. Middleware is a layer that is automatically inserted into the function calls between receiving the request and returning a response. In this case, we are asking Express to run the stylus middleware and the static middleware for all requests in which the URL specific a path inside the public folder of our project. We use to this server CSS and JavaScript verbatim and not execute a request function for that URL.Line 27 through 30
In these lines, we are specifying to Express to handle errors if the environment is set as development and not production. You don’t have to worry about these lines.Line 32, 33
In these lines, we are finally mapping a URL path in a HTTP request to a specific function to handling the response. We will get back to this shortly.Line 35 through 38
In these lines, we create a HTTP server and specify the port, along with a callback on success to say the server has been started.Routing
Routing and how to properly do routes is a controversial topic and there is no correct answer. There are plenty of modules implementing routing for Express and Node.js, each with a different flavor and structure. We will stick to the routing engine packaged with Express. In app.js, we already specified the routing engine and we import the route modules from the route directory. We added the routes in line 32-33. In other words, we mapped the URL in the browser to the function on the server that will respond to that request. Those functions that will handle the requests are in the routes directory. Let’s take a look at index.js./*
* GET home page.
*/
exports.index = function(req, res){
res.render('index', { title: 'Express' });
};
It’s just three lines but those three lines do a ton of work. Line 1 adds a function called index to the exports variable. The exports variable is created by Node.js every time a module is loaded to allow you to pass functions and variables to other modules, in this case, the app.js module.
The function index takes two parameters, req and res. If you recall from Part 1, the req parameter held the request received and the res parameter holds a variable to which you write your response. In this case, we are executing the render function in the response variable which takes two parameters. The first is the parameter that specifies the view to use (the view is a file in the views directory) and the extension of the file is not required so index will make to index.jade. The second parameter is an object containing data that can be inserted into the jade template.
The Index Template
The index.jade template is a whole different language that will not be explained in this tutorial. A knowledge of HTML is required for this entire tutorial series and in this case you will notice that the jade templating language maps almost always directly to HTML.extends layout
block content
h1= title
p Welcome to #{title}
With the exception of the “block” and “extends” keywords, the other keywords are signify exactly the same thing as in HTML. This template will be converted by jade middleware we loaded into the following HTML.
<!DOCTYPE html>
<html>
<head>
    <title>Express</title>
    <link rel="stylesheet" href="/stylesheets/style.css">
</head>
  <body>
    <h1>Express</h1>
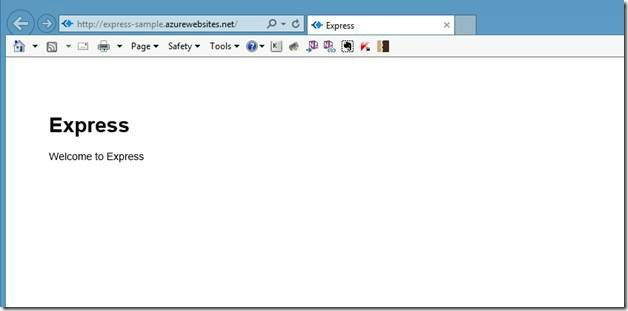
        <p>Welcome to Express</p>
  </body>
</html>
You will notice that the H1 tag that was generated contains the value of title that we passed previously in the render function. You will also notice it was inserted into the p tag directly in line with the text. You will also undoubtedly notice that the entire HTML generated includes things not mapped in Jade. That is where the “extends” keyword comes in. In this case, we chose to extend the layout.jade file.
doctype html
html
  head
    title= title
    link(rel='stylesheet', href='/stylesheets/style.css')
  body
    block content
You’ll notice that the “block content” sreappears in both files, this is used by jade to specify that this block of HTML goes here (in the layout.jade file) and this is what it looks like (in the index.jade file).
In the layout.jade file, you will notice a link to a style.css file which seemingly does not exist in our initial project. This file is generated from the style.styl code using the Stylus middleware as we set it up in app.js
There you have it! How we go from app.js to a route defining the response and to finally the view declaring what that response looks like. If you choose to run the web app locally by clicking on the debug button (you can choose a different browser by clicking the dropdown button on the right).
 When pressed, this will start a Node.js server and open Internet Explorer to the root URL.


Publishing to Azure (for those using Visual Studio)
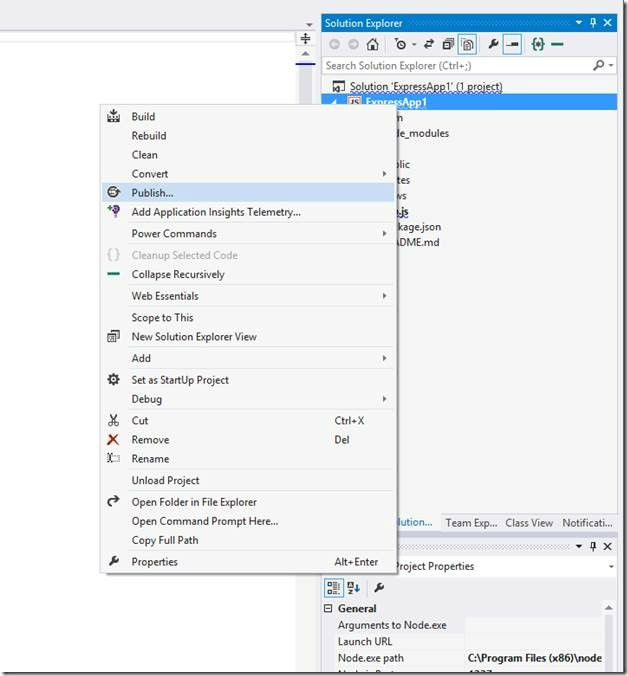
Now that we’ve got an Express-based Node.js app working, let’s deploy it to the cloud in a few clicks. You can deploy to any cloud that supports Node.js among them Nodejitsu, Heroku, and Engine Yard. I will be using Microsoft Azure as I can run a Node.js website on there for free. You can sign up for a free trial of Microsoft Azure here. You will get $220 to spend on all Azure services. For the service we are using, Azure Websites, you can actually run 10 websites without spending a dime. 1. Once you’ve got your Azure account setup, we will go back to the IDE and right click on the Express project and select the Publish item from the menu. 2. The Publish menu item will open a wizard with a few options, you will want to select the target Microsoft Azure Websites.
3. You will be asked to sign in at this step. Please use the same Microsoft Account here as you did on the Azure sign up.
4. You will want to click New to create a new Azure website. If you already have one created, you can simply select it from the dropdown.
 5. Complete the fields in the wizard (just like below). Make sure to choose a unique site name and click Create.
 6. You will be faced with a pre-filled wizard with a Publish bottom at the button, press Publish.
 YOU ARE DONE! YOU ARE NOW PUBLISHED TO THE AZURE CLOUD!
Take a tour of the Azure Websites in the Azure portal. You can watch a video here.
Note: if you encounter errors publishing, be sure to place your project closer to the root of the drive to avoid temporary copying errors.


