Adobe Illustrator Tutorial: Be My Valentine
Valentine's Day, the most romantic holiday of the year is upon us. So why not take the opportunity to learn how to create a romantic gift box in AI. In this Adobe Illustrator tutorial we will be learning how to create a heart shaped gift box by using a few basic tools such as the Ellipse Tool (
 Duplicate (
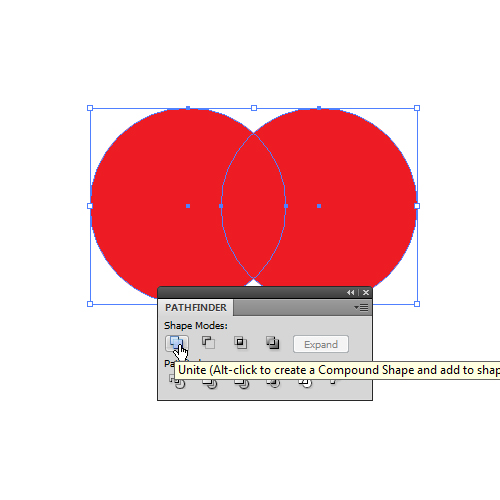
 Select both circles and under the Pathfinder Panel hit the Unite button. It will turn both circles into one object.
 Now grab the Direct Selection Tool (
 With the Convert Anchor Point Tool (
 With Delete Anchor Point Tool (
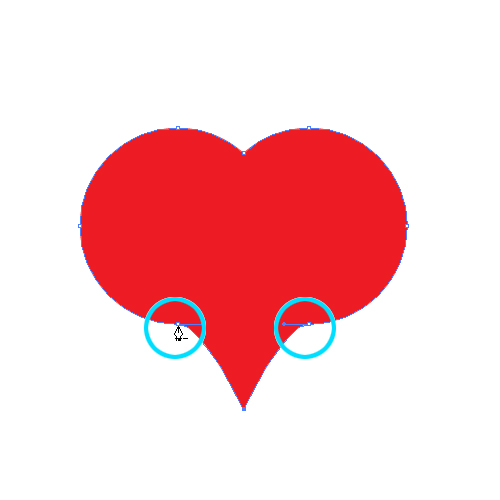 You should end up with something like this.
 As you can see, this isn't a perfect heart. It seems a little bit edgy. Let fix that. Grab the Direct Selection Tool (
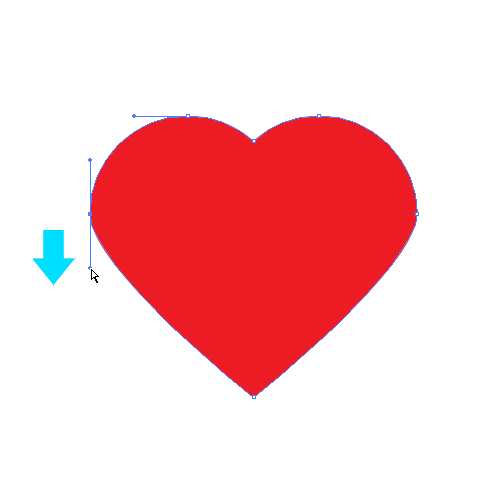 You can see the difference between the left and right sides of the heart.
 Repeat that step for the right side of the heart as well. You should end up with the perfect shape of the heart.
 Feel free to adjust the position and the number of anchor points until you reach desirable look of the heart.
 Now grab the Ellipse Tool (
 Duplicate the circle and move it to the right side of the rectangle. To do that hold the Alt / Opt key on your keyboard, click on the circle and drag it to the right side of the rectangle. Don't forget to hold the Shift key on your keyboard for straight dragging. If this is too complicated for you, just duplicate (
 Select both circles and under Object select Blend > Make. It will create more circles in the middle.
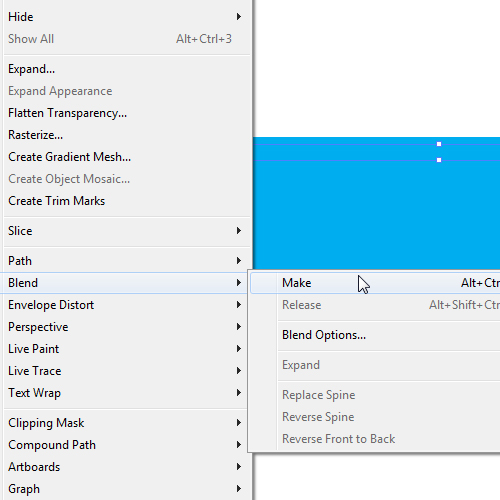 To set the exact number of the circles select Object > Blend > Blend Options.
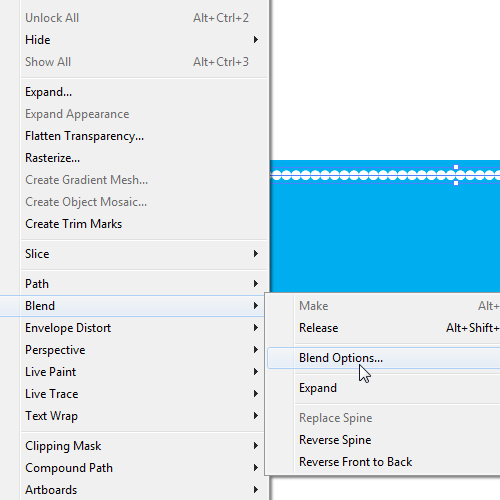 Set the Spacing to Specified Steps and the value to
  Duplicate (
 Select both rows and under the Object select Blend > Make. It will create a few rows with circles in the middle. To set the exact number of the rows again select Object > Blend > Blend Options. Set the Spacing to Specified Steps and the value to
  Expand the circles again (Object > Expand). Select all the circles and duplicate them (
 Group (
 Now we have the wrapping paper for our gift box completed. So, let's create the gift box now.
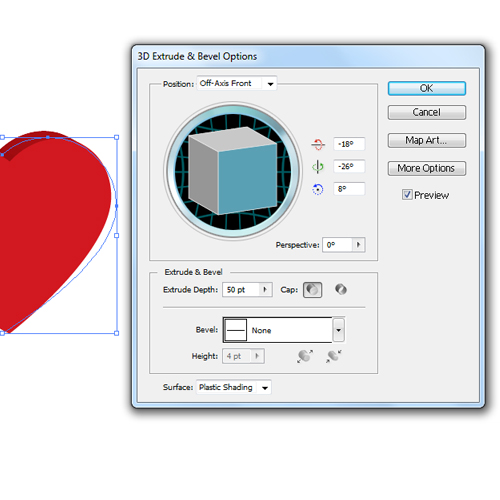 Feel free to play around with the rotation of the box until you find the right angle and the position of the cover. Perspective is very important to the tutorial, so don't forget to include it. For our purpose we will set the Perspective to
 Duplicate (
 As you can see, we are not expanding the hearts yet. We have to be able to adjust all 3D parameters if needed. Within the Appearance Panel (Window > Appearance) we can see which effects have been applied to our objects.
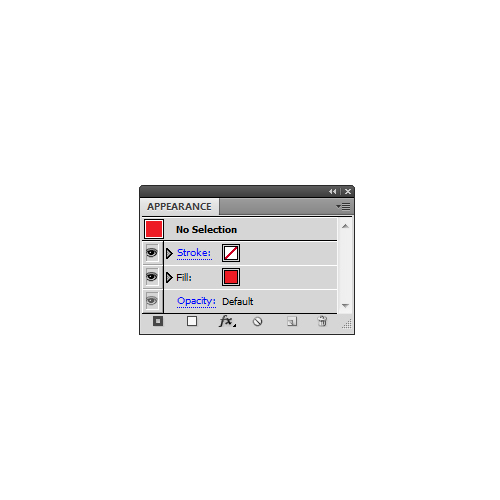 If you select one of the hearts and click on the 3D Extrude & Bevel link under the Appearance Panel you will open the Extrude & Bevel Options window and you will be able to adjust the look of the object.
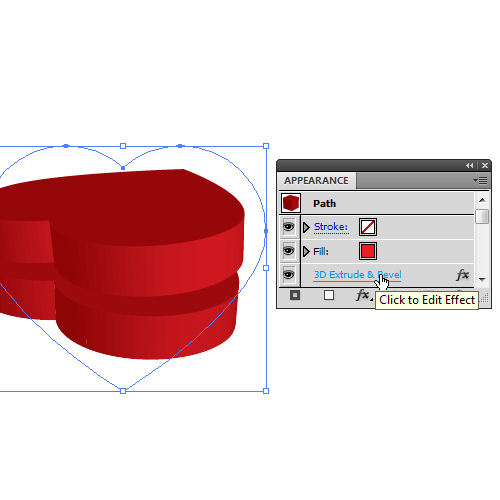 So, let's edit a little bit of our illustration.
Select the lower heart and open Extrude & Bevel Options window. We will have to increase the Extrude Depth in order to create the lower part of the gift box. Set the value for Extrude Depth to
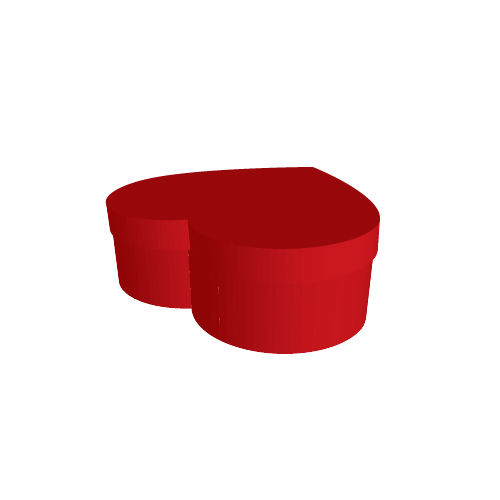
 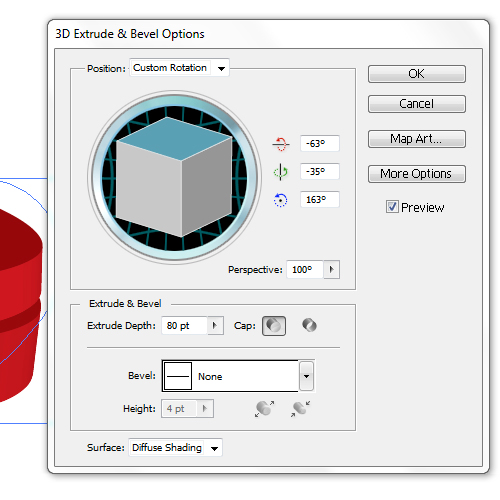 Make sure to upscale the upper heart (cover of the gift box) a little bit. You may have to adjust other settings as well, in order to achieve the right look for your gift box. You should end up with something like this.
 When we are done with the cover it should look like this.
 Repeat the previous step for the lower part of the gift box. You should end up with something like this.
L) and Pen Tool (P).
3D effect Extrude & Bevel will help us with the Perspective (which is a very important aspect of this tutorial). Beside that we will create a nice pattern that we will use as wrapping paper and fancy ribbon to complete our illustration.
So, let's move from words to deeds. This is what we will be creating.

Creating the Heart
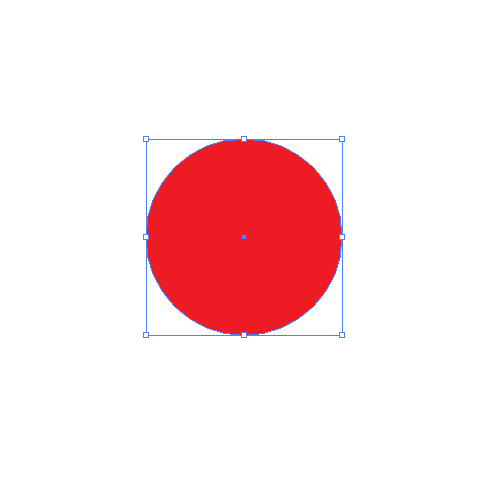
In this tutorial we will do everything from scratch. First thing we have to do is to create a nice heart. Grab the Ellipse Tool (L) from the Tool Panel and create a perfect circle (hold the Shift key on the keyboard for the even shape).
 Duplicate (
Ctrl / Cmd + C, Ctrl / Cmd + F) the circle and nudge it to the right, as shown in the picture below.
 Select both circles and under the Pathfinder Panel hit the Unite button. It will turn both circles into one object.
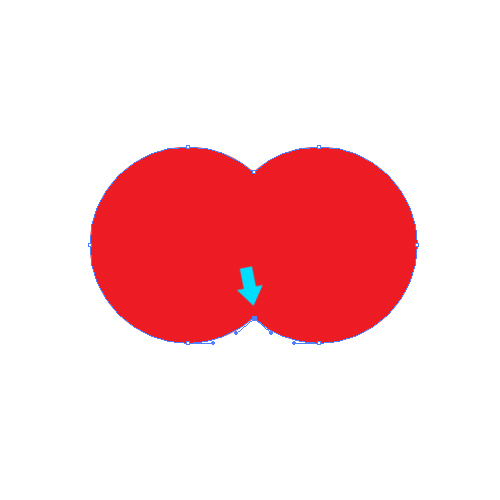
 Now grab the Direct Selection Tool (
A) from the Tool Panel and select the lower middle anchor point. Hold the Shift key on the keyboard and drag that anchor point downwards.

 With the Convert Anchor Point Tool (
Shift + C) click on that anchor point in order to create a sharp corner.
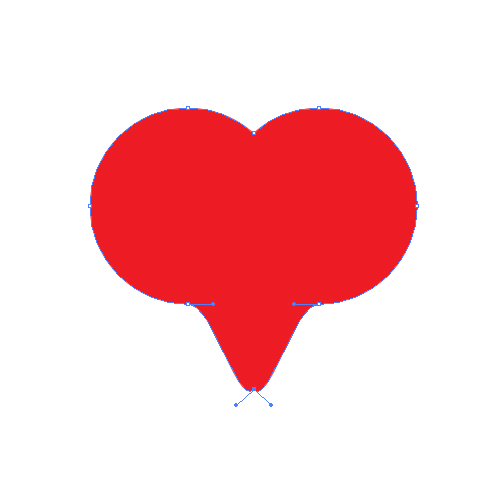
 With Delete Anchor Point Tool (
-) we will now remove two anchor points.
 You should end up with something like this.
 As you can see, this isn't a perfect heart. It seems a little bit edgy. Let fix that. Grab the Direct Selection Tool (
A) from the Tool Panel. Click on the anchor point on the left side of the heart. Make sure to pull the end of the handle downwards (don't forget to hold the Shift key on your keyboard while you're doing this, for straight dragging).
 You can see the difference between the left and right sides of the heart.
 Repeat that step for the right side of the heart as well. You should end up with the perfect shape of the heart.
 Feel free to adjust the position and the number of anchor points until you reach desirable look of the heart.
Creating the Wrapping Paper
In this part of the tutorial we will create a nice and simple pattern for our gift box. Select the Rectangle Tool (M) from the Tool Panel and create a large rectangle. We will use it to create a symbol for the wrapping paper. The rectangle has to be large enough to cover all the parts of the gift box. Set the Fill color to any color you like, we will change the color in the final step anyway.
 Now grab the Ellipse Tool (
L) from the Tool Panel and create a small circle.
 Duplicate the circle and move it to the right side of the rectangle. To do that hold the Alt / Opt key on your keyboard, click on the circle and drag it to the right side of the rectangle. Don't forget to hold the Shift key on your keyboard for straight dragging. If this is too complicated for you, just duplicate (
Ctrl / Cmd + C, Ctrl / Cmd + F) the circle and move it to the right.
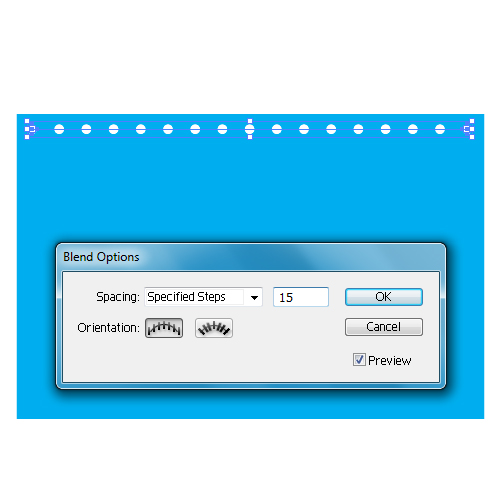
 Select both circles and under Object select Blend > Make. It will create more circles in the middle.
 To set the exact number of the circles select Object > Blend > Blend Options.
 Set the Spacing to Specified Steps and the value to
 15.
 Duplicate (
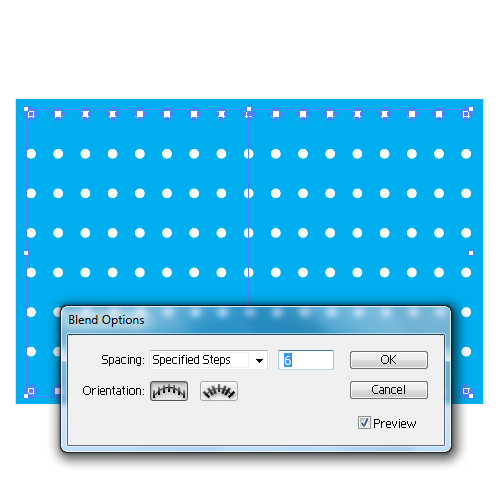
Ctrl / Cmd + C, Ctrl / Cmd + F) the row of circles and place the copy as is pictured below. Make sure to expand both rows (to turn them into an editable object). Just select Object > Expand.
 Select both rows and under the Object select Blend > Make. It will create a few rows with circles in the middle. To set the exact number of the rows again select Object > Blend > Blend Options. Set the Spacing to Specified Steps and the value to
 6.
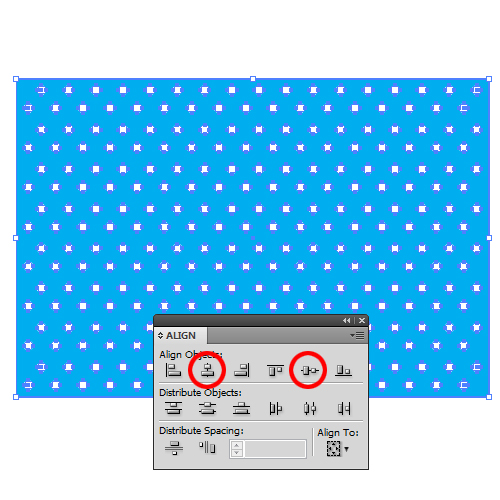
 Expand the circles again (Object > Expand). Select all the circles and duplicate them (
Ctrl / Cmd + C, Ctrl / Cmd + F). Place the copy as it is in the picture. Group (Ctrl / Cmd + G) the circles. Select all the elements and under the Align Panel hit the Vertical and Horizontal Align Center.
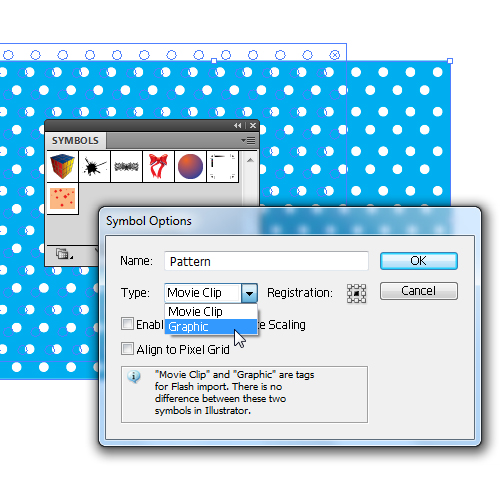
 Group (
Ctrl / Cmd + G) all the elements and drag them to the Symbol Panel. Set the name to Pattern and Type to Graphic. Then hit the OK button.
 Now we have the wrapping paper for our gift box completed. So, let's create the gift box now.
Creating the Shape of the Gift Box
First we will create the cover for the box. Select the shape of the heart we created in the beginning of this tutorial. Under Effect select 3D > Extrude & Bevel. Make sure to check thePreview box to be able to monitor the changes.
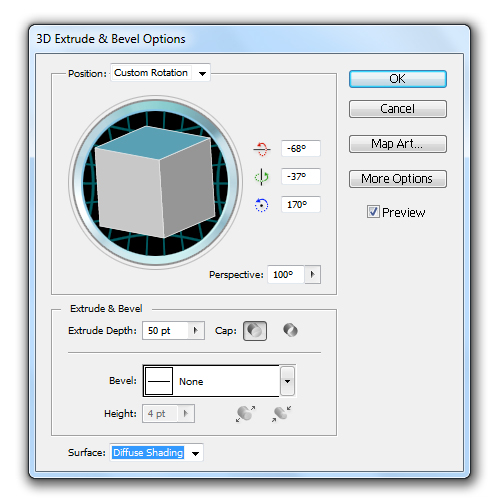
 Feel free to play around with the rotation of the box until you find the right angle and the position of the cover. Perspective is very important to the tutorial, so don't forget to include it. For our purpose we will set the Perspective to
 100. Feel free to adjust to your liking.

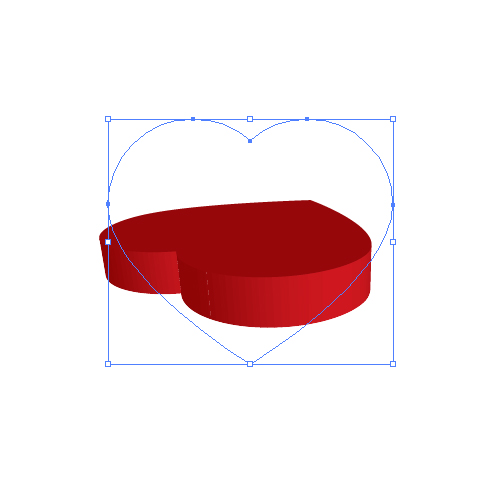
 Duplicate (
Ctrl / Cmd + C, Ctrl / Cmd + F) the heart and nudge it downwards, using the arrow key on your keyboard. We need to make sure to bring the upper heart to the front (Shift + Ctrl / Cmd + ]).
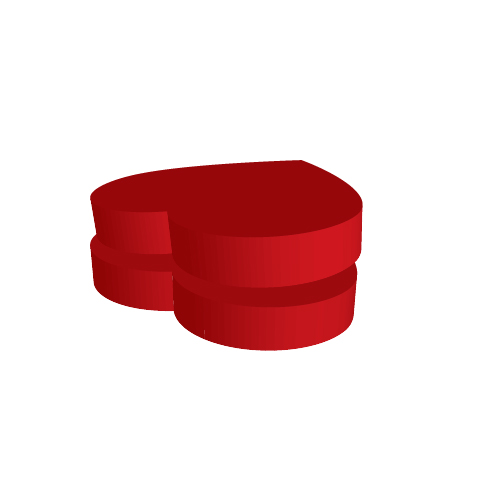
 As you can see, we are not expanding the hearts yet. We have to be able to adjust all 3D parameters if needed. Within the Appearance Panel (Window > Appearance) we can see which effects have been applied to our objects.
 If you select one of the hearts and click on the 3D Extrude & Bevel link under the Appearance Panel you will open the Extrude & Bevel Options window and you will be able to adjust the look of the object.
 So, let's edit a little bit of our illustration.
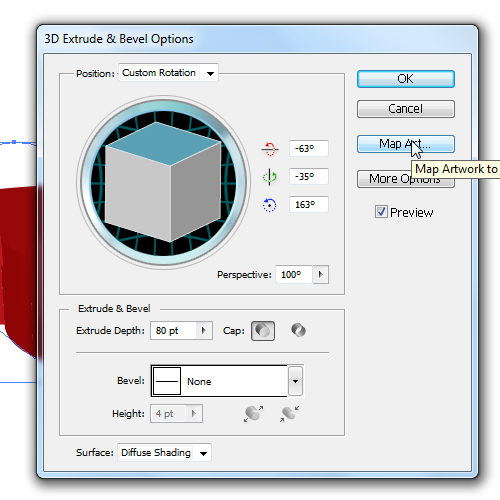
Select the lower heart and open Extrude & Bevel Options window. We will have to increase the Extrude Depth in order to create the lower part of the gift box. Set the value for Extrude Depth to
 80.
 Make sure to upscale the upper heart (cover of the gift box) a little bit. You may have to adjust other settings as well, in order to achieve the right look for your gift box. You should end up with something like this.

Applying the Symbol of the Wrapping Paper to the Gift Box
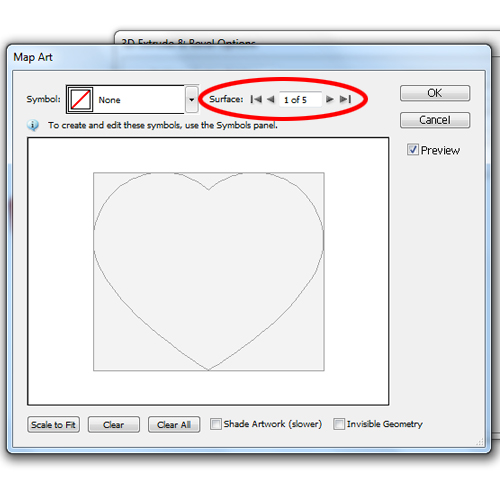
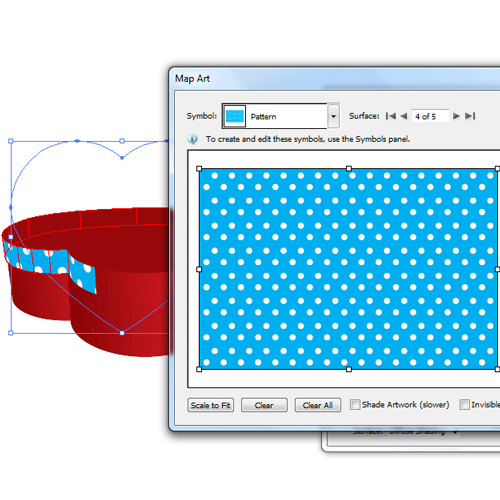
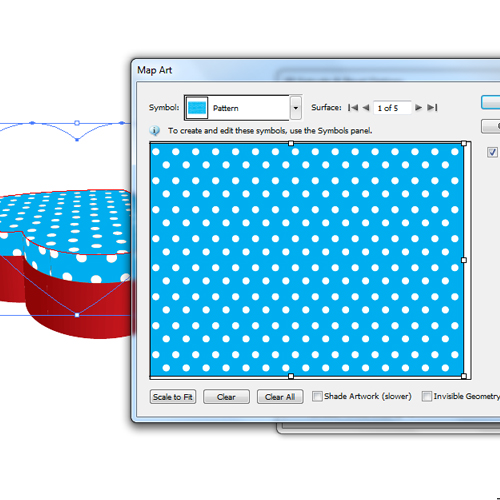
If you are satisfied with the basic look of the gift box we can move on. Basically, we have two hearts with applied 3D effects. Now we will apply the symbol of the wrapping paper to each heart. To apply the symbol to the 3D shape simply hit the Map Art button inside the Extrude & Bevel Options window. A new window will pop up. Switch between the surfaces to apply the pattern we created earlier.


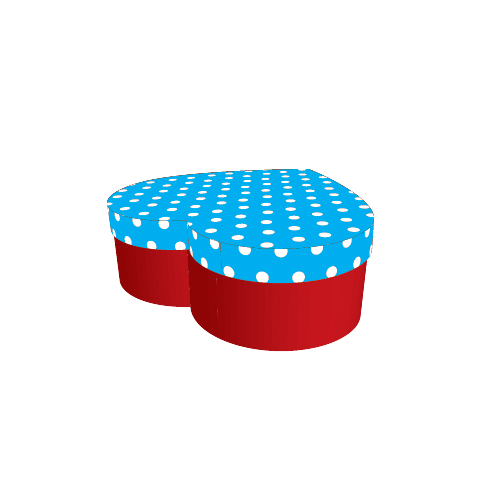
 When we are done with the cover it should look like this.
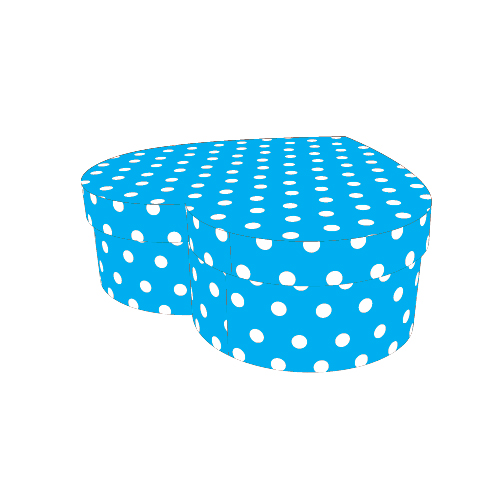
 Repeat the previous step for the lower part of the gift box. You should end up with something like this.


Very nice and good tutorial… Especially nice for a personal Valentines-Day-giftcard. Really good explanations how to do the perspective correctly. Waiting anxiously for more by you!
Oh my god, this is totally awesome! Got a lot of new illustrator-techniques! Thanks a lot!
oh! what a beautiful design in Adobe Illustrator.i think it is as like a magical things .and this tutorial very helpful for all designer.thanks a lot.
PERFECT PERFECTION AND GOOD TUTORIAL DESIGN
Excelent tutorial, for me, I am beggineer, and It was useful for me.
Thank you.
Heya cool tutorial. an easier way to do a balanced heart is to create half a heart however you wish, making sure the top and bottom points of the heart are in line. then copy and paste the heart half, use the reflect tool and shift to keep things straight. line up both the sides (using smart guides to line up perfectly). now use the shape mode add to shape area and expand.
Excelent tutorials for me. I am begginer. Thank you very much for tutorials.
First, lovely tutorial. I have some experience with Illustrator. everything going well until applying the symbol polka dots. Some sectors of the heart will just not fill with the pattern. Help?